If you've read through our Getting Started With Accounting guide, you should be somewhat familiar with the concept of accounting transactions in Farmbrite. Essentially, you'll add income and expense transactions to your accounting system, which will then total to a profit or loss. These transactions are used for many aspects of accounting. They create your charts and graphs, populate your accounting categories, and eventually flow into your P&L Statement, Cash Flow, Tax Summary, and other financial reports. The first step towards all those is to create your transactions.
Transactions can be added in four ways.
- Individually on the Accounting Dashboard - You'll click a button to "Record a Transaction" and supply details for each transaction.
- In bulk by importing on the Accounting Dashboard - You can upload a spreadsheet of data to add multiple transactions at once. This can also be used to bulk update transactions you already have in Farmbrite.
- Individually on pages where the income or expense should be associated - For example, you might record the expense of livestock feed on the animal's page, or of equipment maintenance and repairs in your Resources section.
- When performing an action on a record, you might incur expenses when adding a treatment to a crop or animal record, or when servicing a piece of equipment. You could also bring in income when completing an order and marking it as paid. These actions can optionally create accounting transactions to track the income and expenses that result from working with records.
We will outline each method below with step-by-step instructions.
Be aware that you may use any combination of these methods at any time to add your transactions. No matter what method you choose, your transactions will show in those charts, graphs, reports, and your P&L statement. The decision is up to your preference, and you can use whichever method you like, whenever you like.
Adding Transactions on the Accounting Dashboard
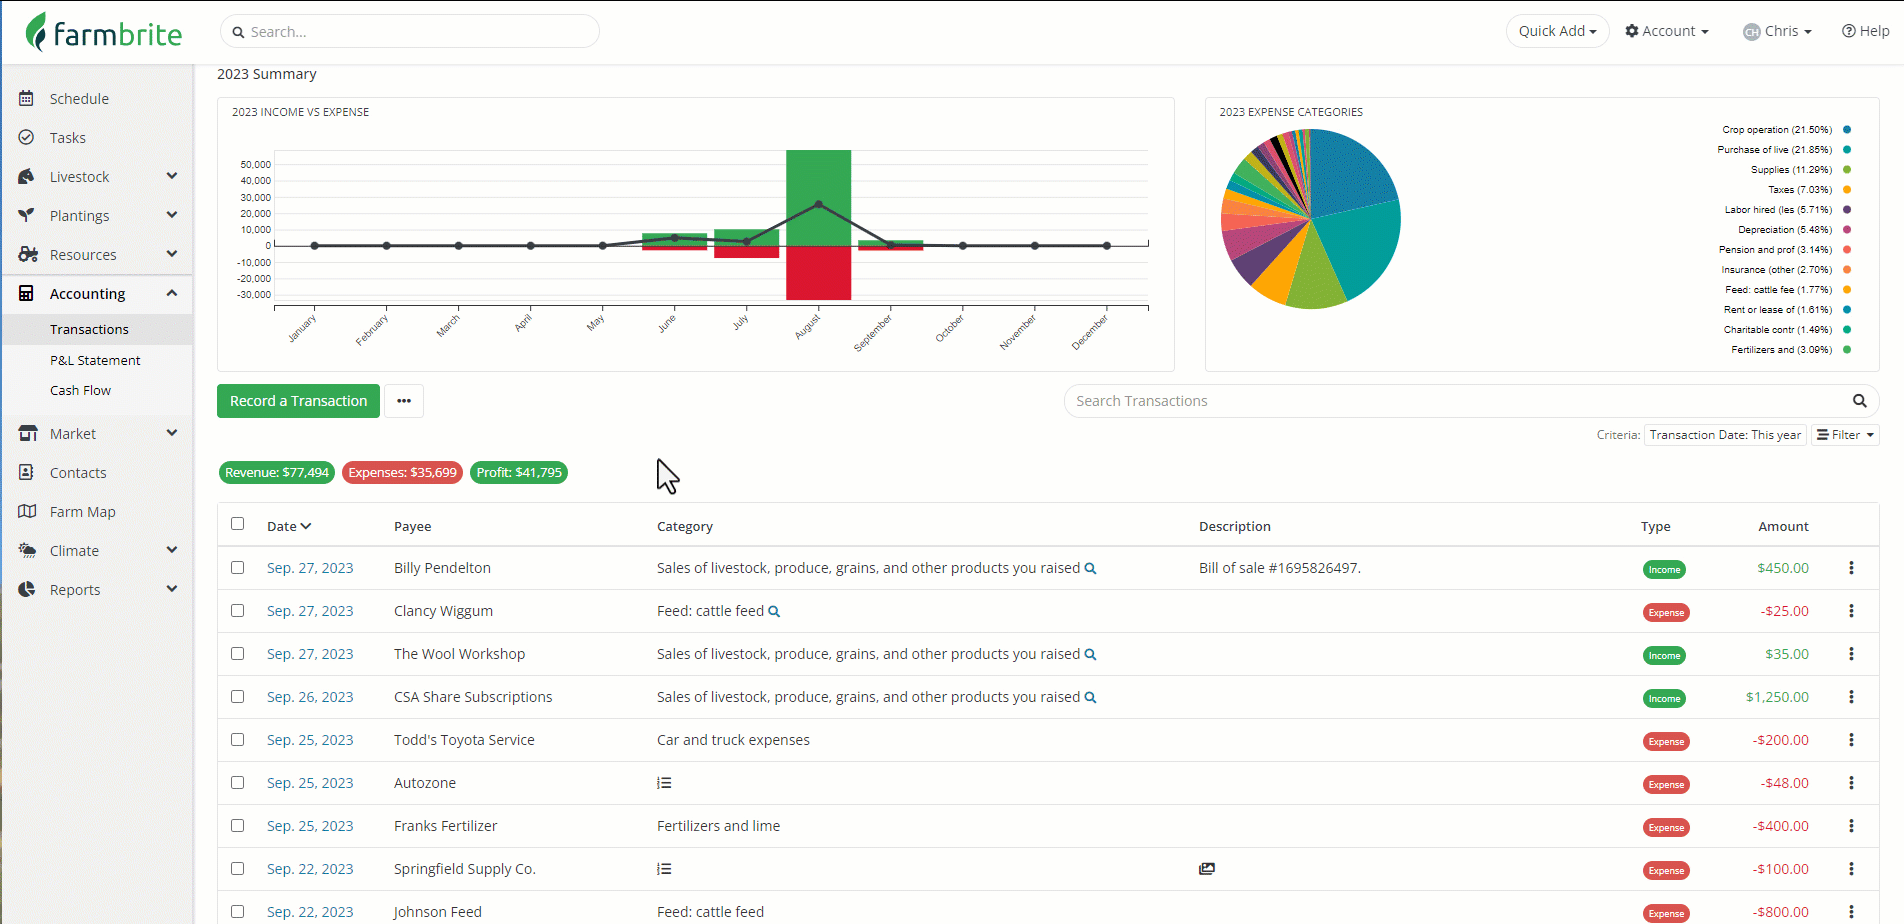
The first method for adding transactions is directly from your Accounting Dashboard. Select Accounting in the main menu, and then click the green button to Record a Transaction. A new window will open asking for details about the transaction. You can supply the following information:
- Type of transaction - Is it Income or Expense?
- Amount of the transaction - How much was it for?
- NOTE: Be aware that you do not need to supply a negative number for an expense. Setting the type as "expense" automatically tells the system that this transaction is "negative", and reflects that way on your Profit and Loss, Spending by Category, Tax Summary, and other reports and calculations.
- Date of the transaction - When did the transaction take place?
- Reporting Year - What year should this transaction be added to? If you buy seeds in December for next year's crop, you may want to select the upcoming year to more accurately track your costs for that season.
- Customer/Payee information - Who did you pay, or who paid you? This field will search and preload any previous customers/payees from existing transactions, and also search your Farmbrite contacts.
- Category of the transaction - How should this transaction be categorized for your charts and reports? Check out this article for more information on how to use farm accounting categories.
- Optionally choose to split the transaction into multiple categories by using the Split Transactions button. Read all about how you can split farm accounting transactions in this article.
- Associate the transaction with an animal, crop, field, or resource.
- Check Number - if you were paid with a check, or paid someone else by check, record it here for easier searching later.
- Keywords to use when searching for this transaction later - You can add multiple by separating them with a comma.
- Description of the transaction - to add more detailed information about the transaction that does not fit in one of the other fields.
- Attach Image - You can attach an image of the receipt for this transaction. While it won't parse the data and automatically complete the other fields above, you can keep a copy of the receipt for your records here.
Need to track something else? You can create custom fields for your accounting transactions to track any other details that you need.
Once you've added the relevant information, click Save, and the transaction is added to Farmbrite.
Adding Transactions From Other Pages
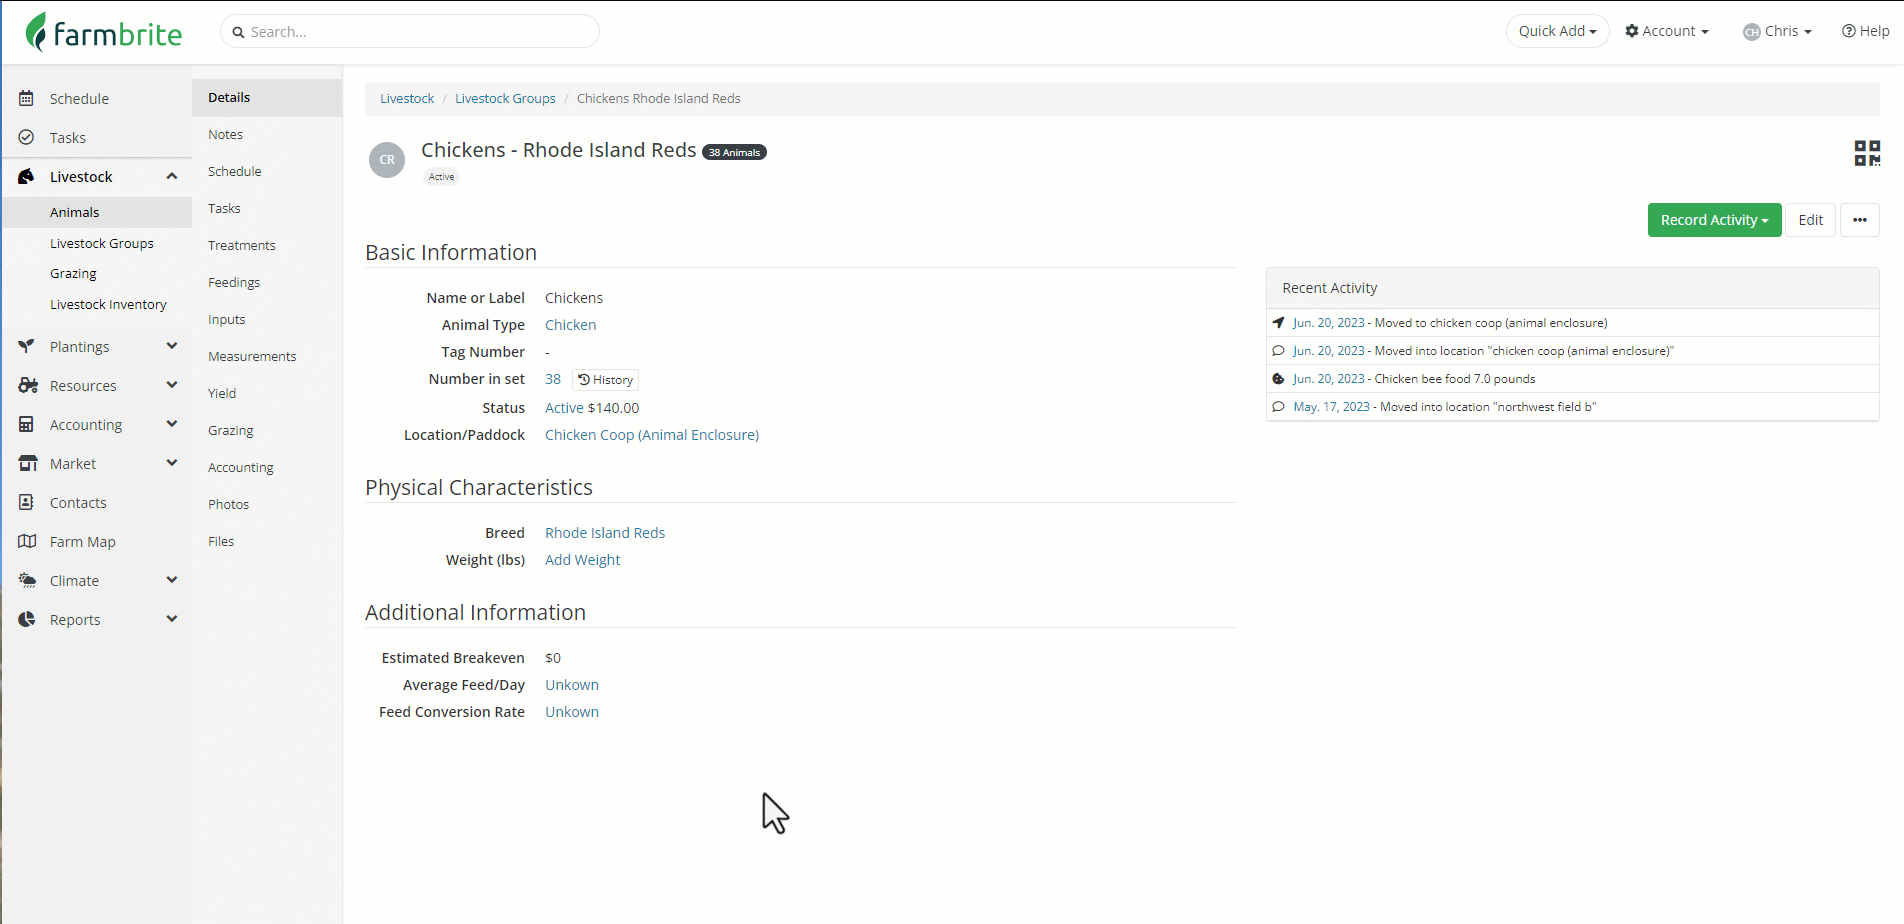
This method for adding accounting transactions is similar to the first one you saw above. You saw that you could "Associate" a transaction with an animal, crop, field, or resource. This helps you calculate the expenses, income, and profit for that particular item. You can also create the transaction directly from those records to make that association as well. The process is identical, except that you'll create the transaction record from the item's accounting tab. Check out our example of adding a transaction to our chicken flock below.
Importing Transactions
If you are migrating to Farmbrite from another farm management system or from using spreadsheets to track your accounting, you might find it easier to load your previous transactions by using the import feature. This bulk method lets you easily create your basic records and get started.
You'll find the transaction import similar to other imports you might have added to Farmbrite. In general, the same steps apply.
For a full walkthrough of your options on importing transactions, check out this help article for more details.
If you still have questions about adding accounting transactions, please reach out to us!
Farmbrite recommends that you work with an accounting professional for any questions specific to your business accounting. They can help ensure compliance with your local laws and offer advice on how to best account for your business needs.