You might need to import many animals into your Farmbrite system at once. This could be because you're just starting out and need to get your whole herd into your new software, or maybe you just purchased many animals and want to add them to your existing herd. You can easily add animals in bulk by importing them through a .csv spreadsheet file. You can also use this import feature to bulk update your animals, or add measurements for them as well.
Overall, the process of importing animals is nearly identical to other Farmbrite imports you may have worked with in the past - you'll create a spreadsheet with the data you want to import, map your columns, and then import the records. We provide an import template with preloaded column headers to make this easy for you. If you have created custom fields on your livestock records, we suggest you download your current records from the livestock homepage to see the column names for your unique custom fields that will not be on the standard template.
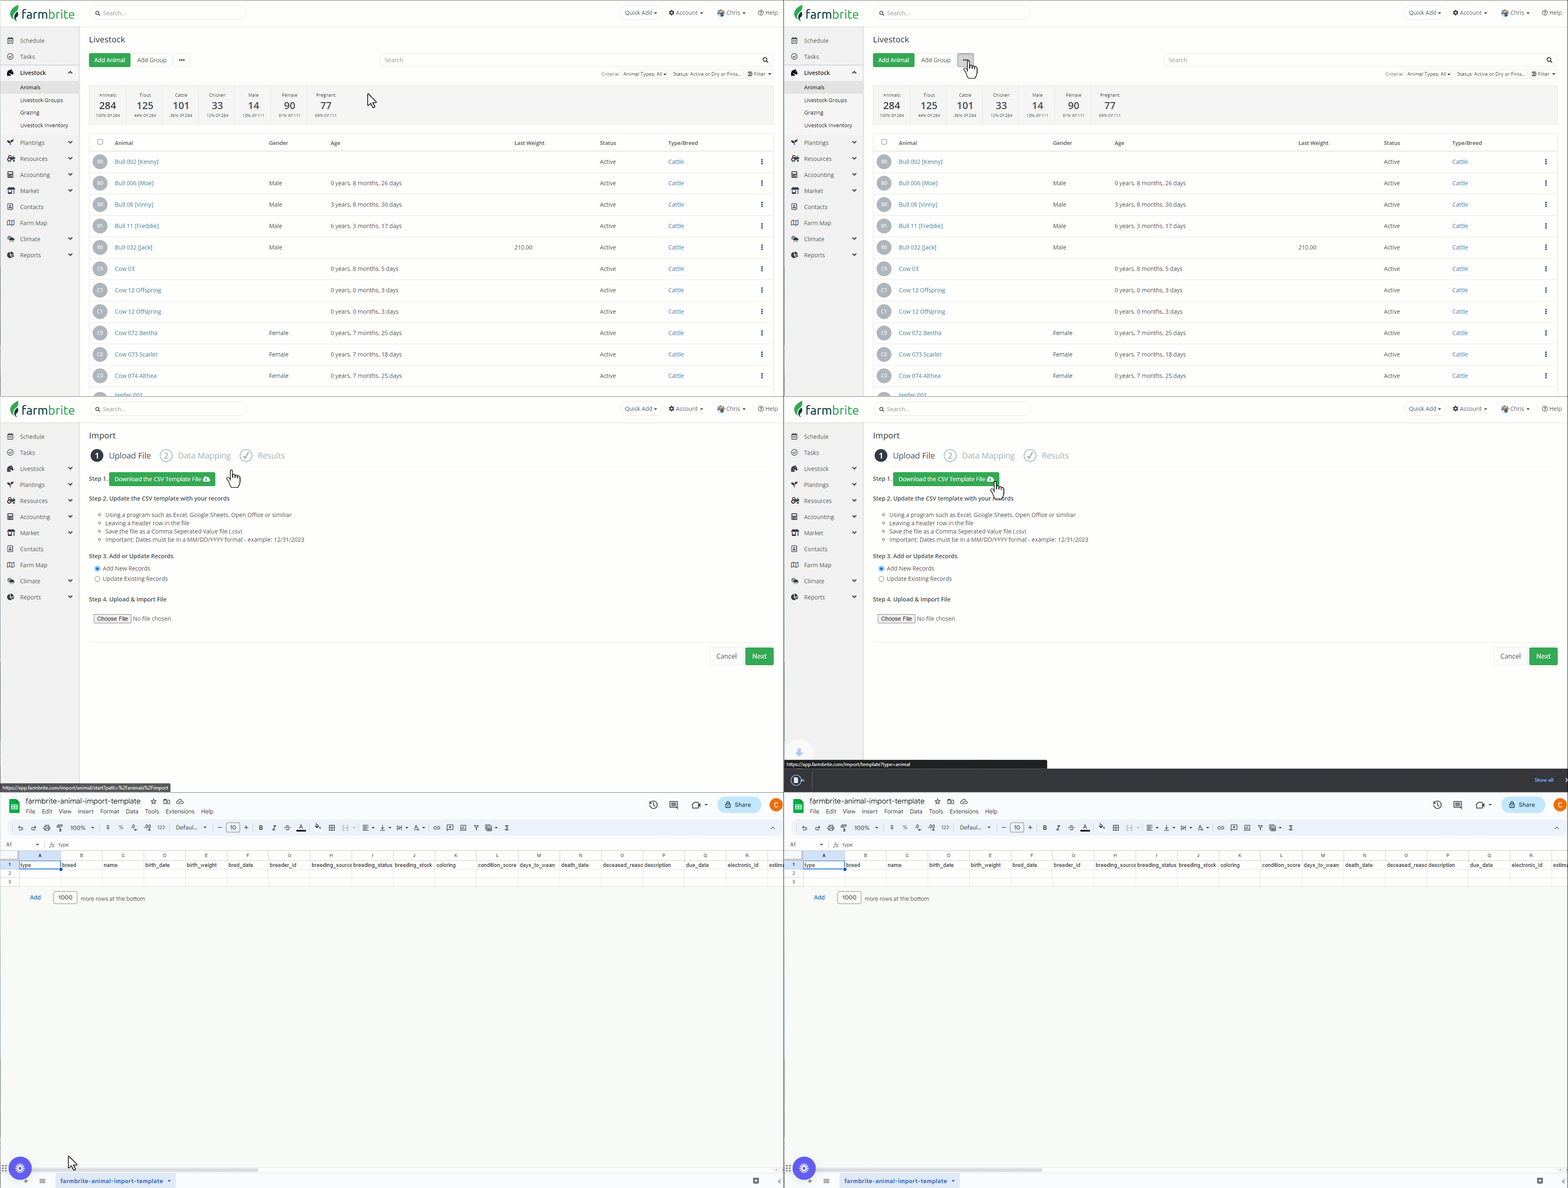
Specific to the Livestock import, you can navigate to Livestock, and choose Animals. From there, click the Actions Menu (3 Dots, see screenshot below) and choose Import Records, or Bulk Update From File if you are wanting to update existing animals. We think you'll be better prepared for a successful import by downloading and utilizing our CSV Template File that includes default column headers. Download it, and open it with a spreadsheet program like Excel or Google Sheets.
You'll add your data to the appropriate columns, and then save the file as a .csv from your spreadsheet program.
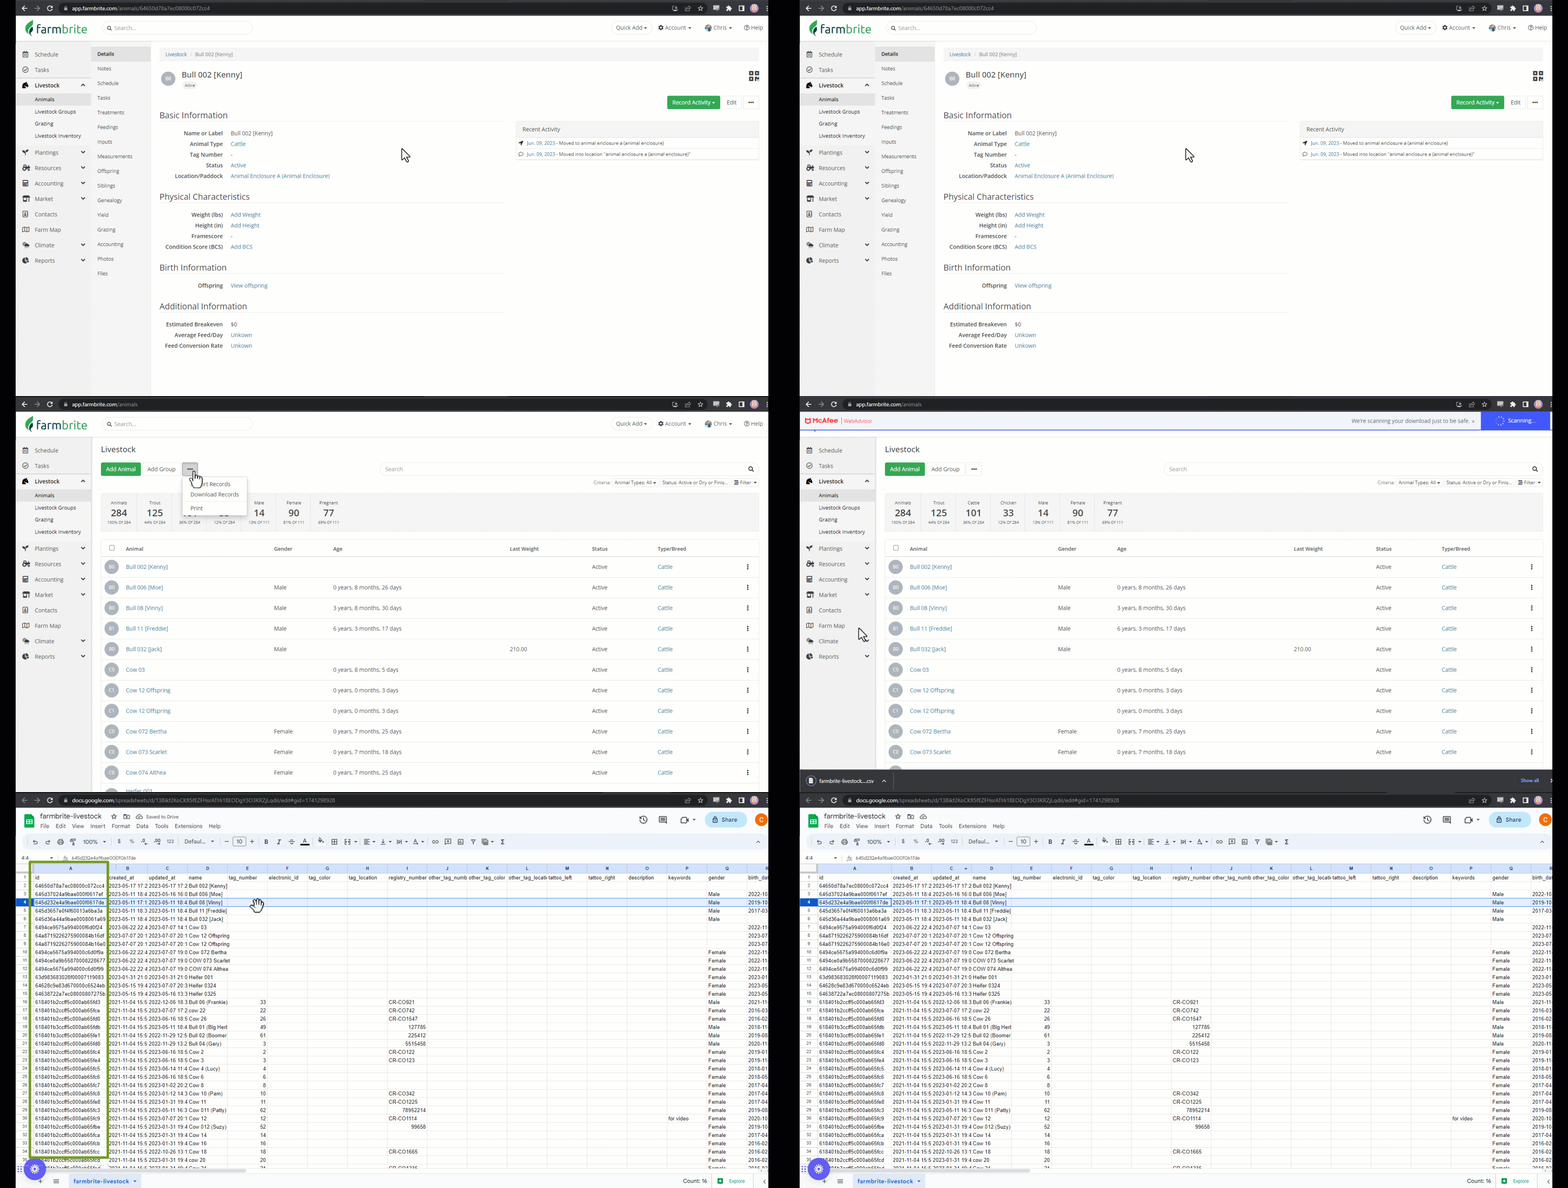
Note that if you are importing animal genealogy and ancestry, you can use the parent animal's Farmbrite ID or Tag Number to associate it. You can get the Farmbrite ID from the URL of animal's record, or download your existing animals into a CSV from Farmbrite to get them in a spreadsheet. Both methods are shown in the image below. Or, if you already have Tag Numbers associated with your animals, you can supply the parents Tag Number to connect them as the Father or Mother.

On the same page where you downloaded the template, you'll see an option to Add New Records or Update Existing Records. Make the appropriate selection for what you'd like to accomplish, and be aware that if you are updating records, you'll need the Animal ID as shown in the example above. When updating, it may be easiest to download your existing records, make changes, and then reupload the file. You can also select if your file has header rows; if you used Farmbrite's template they are included, but if you're using your own spreadsheet it might not.
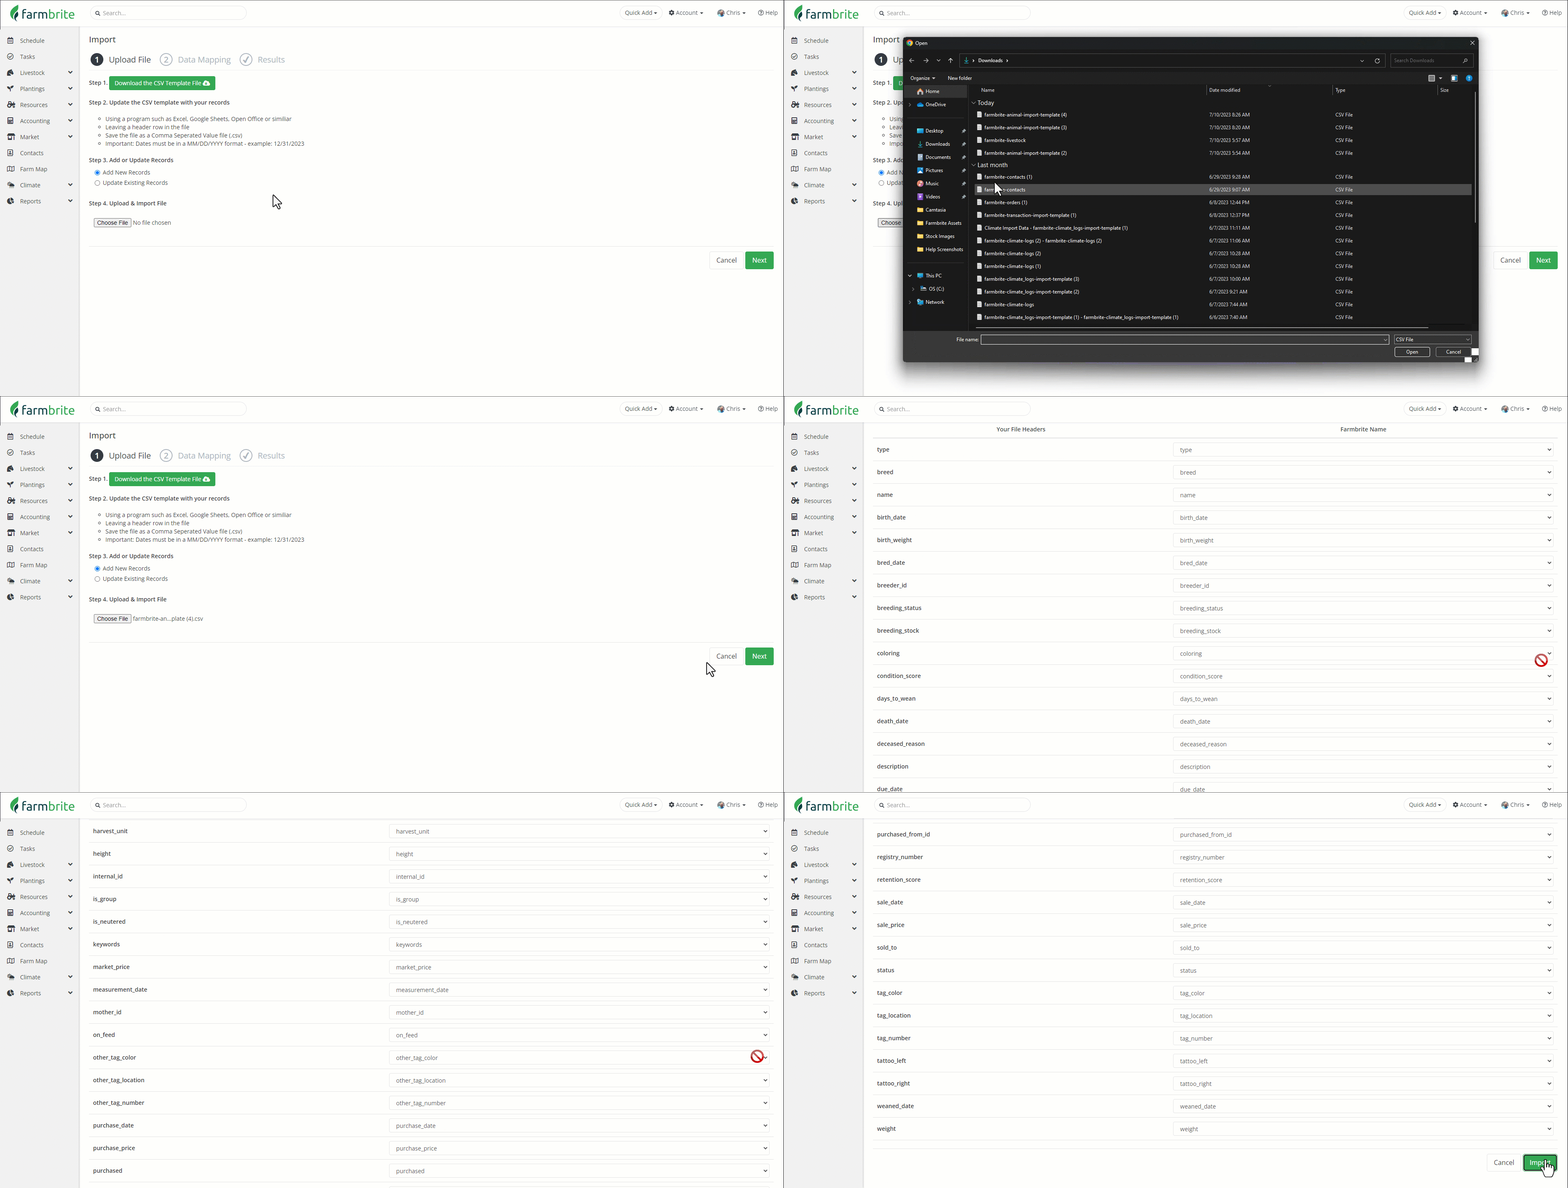
You can then upload your .CSV file. Farmbrite will analyze it and bring you to Step 2 - Mapping your fields. This step has you connect the fields from your spreadsheet in the left column with standard Farmbrite fields shown on the right. You are basically telling the system that "the data in this column from my spreadsheet should be added to this specific field".
In the example below, the columns "type" and "breed" from the spreadsheet are mapped to the field "type" and "breed" in Farmbrite. Essentially, the fields from the left column match to the fields in the right column. If you used the Farmbrite import sheet, you won't have any work to do here, as the fields will automatically match. You might just verify the mapping, and then click Import Records in the bottom right.

Once the file has been processed, you'll be presented with a summary page showing successful imports, and any errors. If you do get an error, double check to be sure the spreadsheet is following the guide and formatted correctly, and reach out if you need help with it.