Need to get a lot of data in to Farmbrite, and want to skip the manual work? You can import many different types of record into Farmbrite from a spreadsheet. You can also use this same import function to edit and update existing records that you've already created. This article will show you the basics, and the bullet points below link you to individual articles about importing into different areas of Farmbrite.
Overall, the process for any of these record types is the same; you'll download a template spreadsheet, complete it with your data, and then upload it to the system to create or update your records.
Imports are available for the following record types.
- Livestock
- Livestock Measurements and Yields
- Crop Types
- Grow Locations
- Nutrients/ Soil Samples
- Crop Harvests
- Accounting Transactions
- Contacts
- Equipment
- Products
- Climate Logs
- Map Coordinates
We are going to use Livestock in the example below, but remember this is available from any of the sections in the bullet points above. Also, be aware that all imports have a 1000 row limit, so if you need to import more than 1000 rows, you'll need multiple spreadsheets/imports.
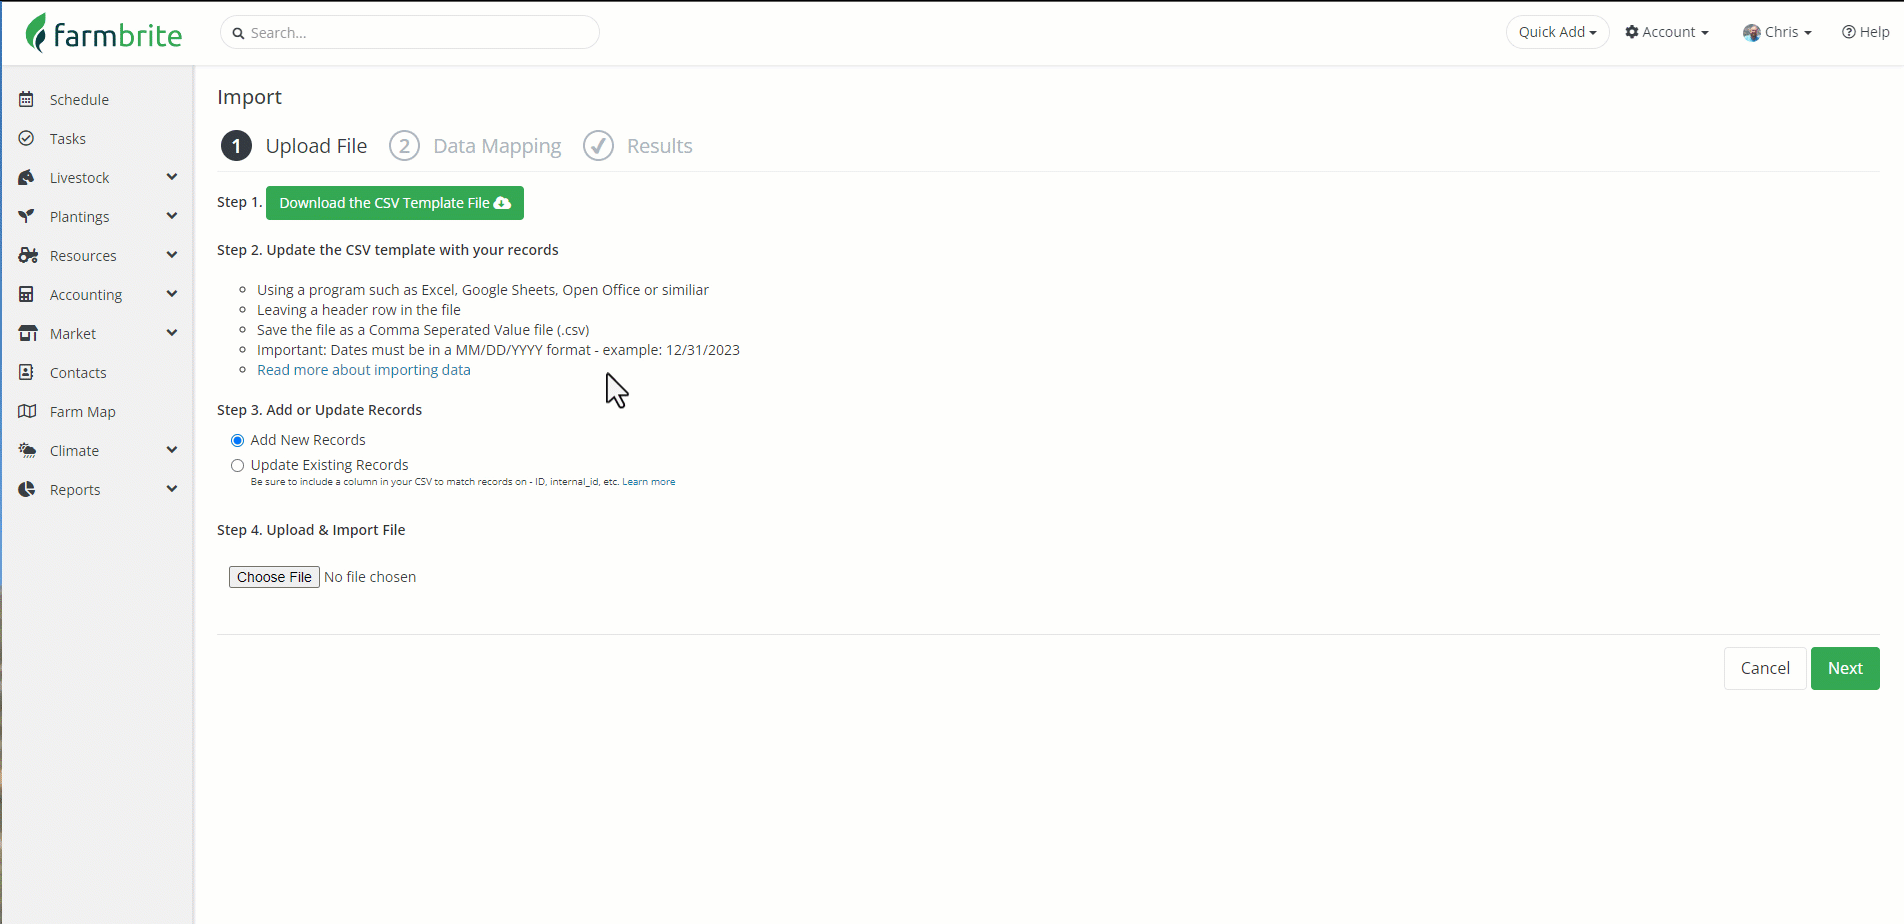
To get started, navigate to the area you wish to import data. From there, click the Actions Button (3 Dots) and select Import Records. A new page will open that presents a step-by-step guide for importing your records. The first step is to download our template spreadsheet that comes preloaded with the column headers you'll need to import the data, highlighted in the image below.
We think using this sheet makes the process much easier, as it gets you started with the available fields, and you can choose which ones to add to data to. However, note that using the file is not required, and that you can use your own existing spreadsheet if you'd like. You'll be required to map your columns to available fields in Farmbrite in a subsequent step in the process if you choose to use your own file template.
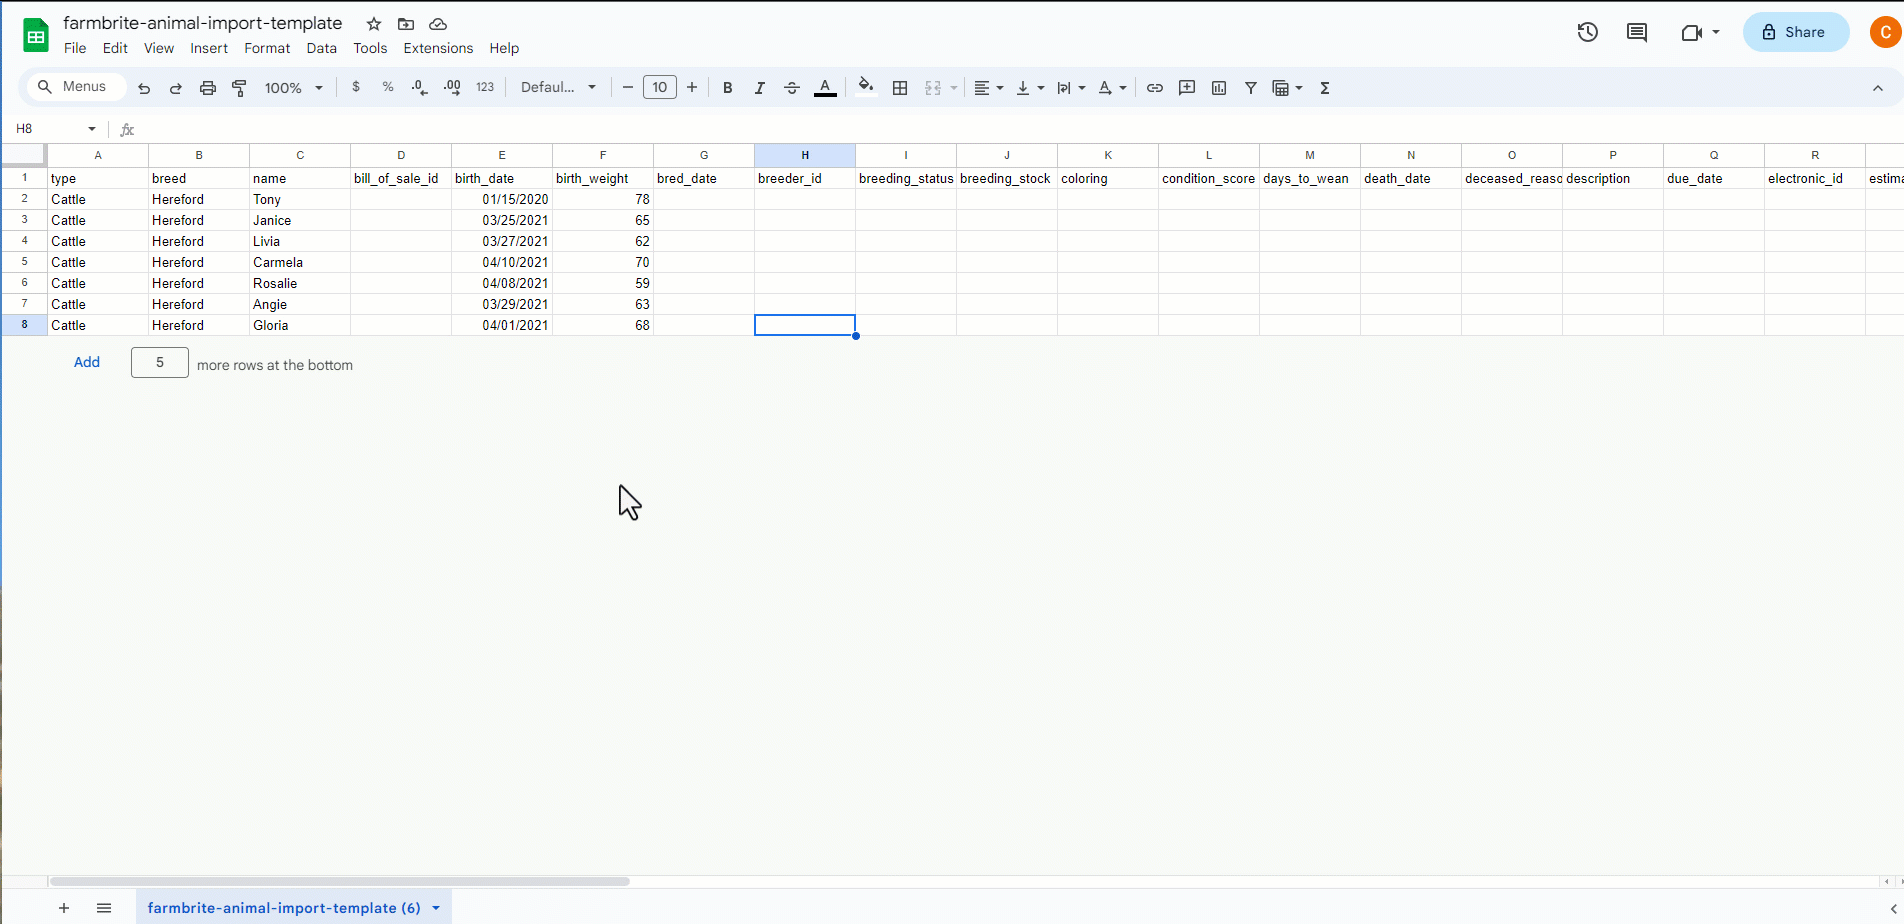
Open the file with a spreadsheet program like Excel or Google Sheets. Each row in your spreadsheet is used for a different animal, and each column is a piece of data about that animal. Complete the spreadsheet with any information you'd like to add. You don't have to supply data in all of the columns, but for a livestock import, at a minimum you should supply a type (cattle, goat, pig, etc.) and a name to distinguish each animal. Beyond that, add what is relevant for you. You can delete columns that you're not using if you'd like a cleaner sheet, but it's not required to do so. You'll end up with something that looks like the image below. Note: If you are providing numerical values, ensure that the decimal point is marked with a period, and not a comma. Save your spreadsheet as a .csv file.
Return to Farmbrite, and select if you are adding new records or updating existing ones. We're adding new ones in our example, but scroll further down this article for a full section about updating existing records via this import process. Then choose your file to upload from wherever you stored the .csv file on your computer. If you are using your own file and not the template, you can also choose whether your file has a header row. You can still map your fields even if this is not the case.
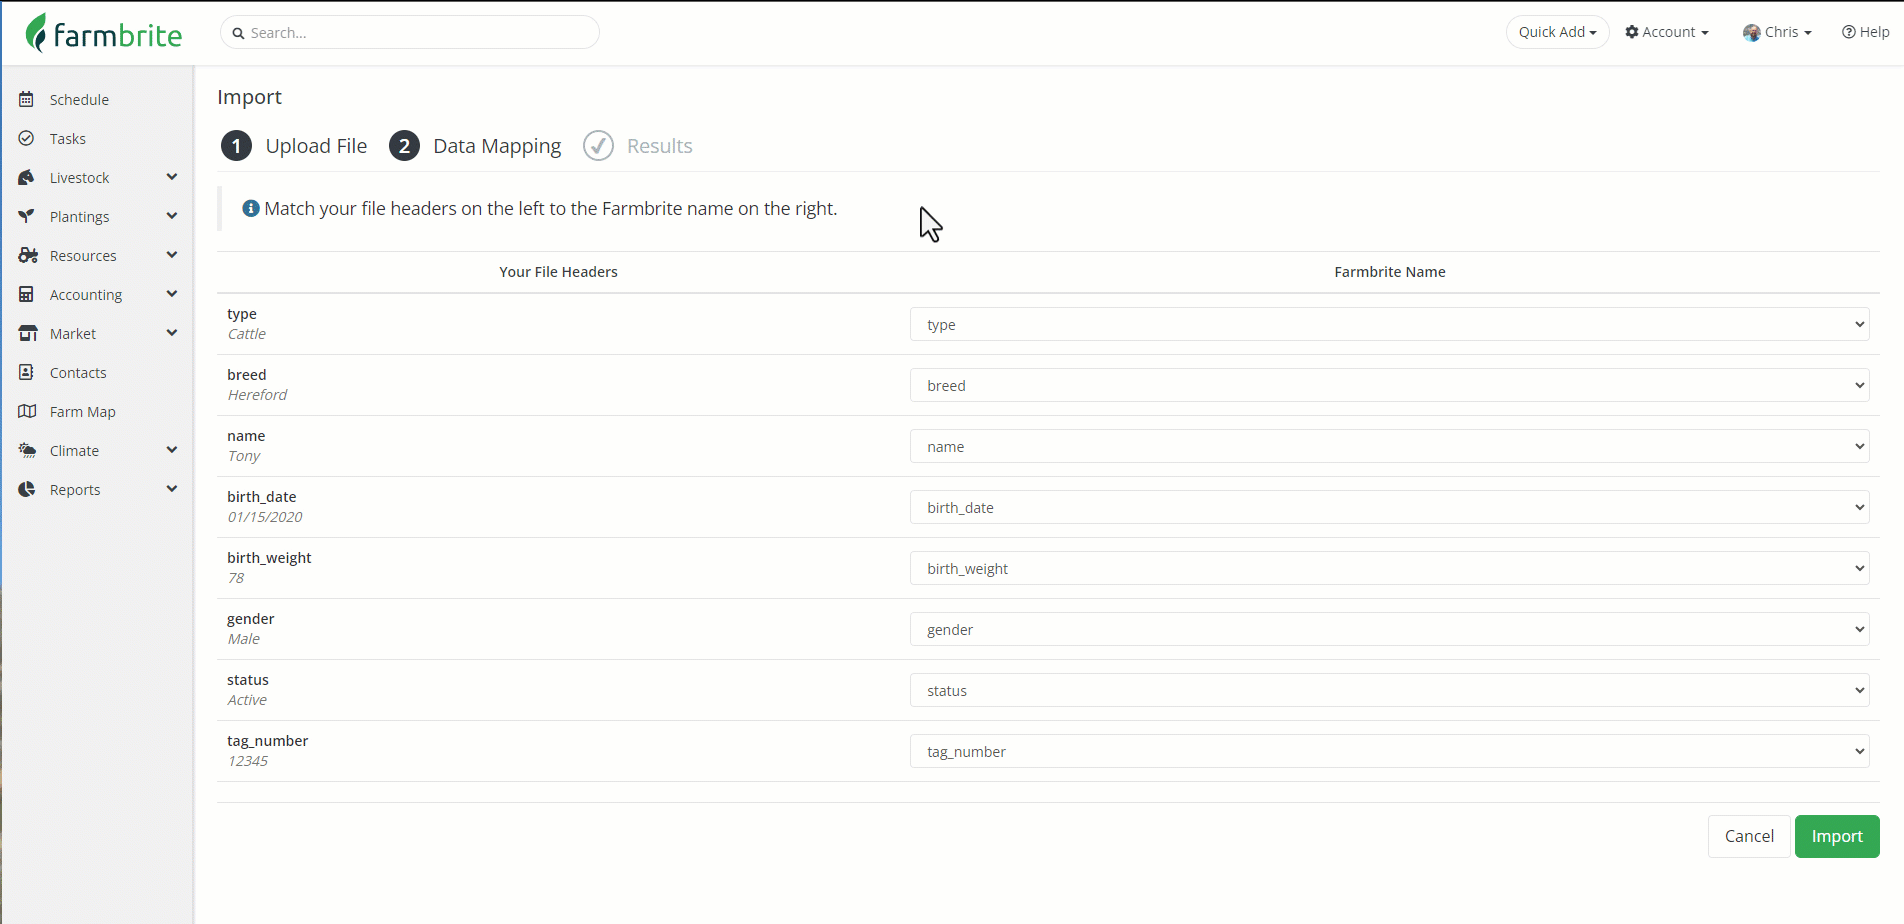
Farmbrite will analyze the file, and bring you to Step 2 - Data Mapping. Essentially, this step has you connect the fields from your spreadsheet in the left column with standard Farmbrite fields shown on the right. You are basically telling the system that "the data in this spreadsheet column should be added to this specific Farmbrite field". In the example below, the column "Type" from the spreadsheet is mapped to the field "Type" in Farmbrite, "Name" to "Name", etc. If you used the Farmbrite import template, you won't have any work to do here, as the fields will automatically match. If you used your own sheet with your own columns, this is your opportunity to match your data with Farmbrite's standard fields.
Additionally, you'll also find a feature to Optionally Specify Default Values, which you can use to supply a value for a specific field to be used for all the records on your import sheet. You can select any field relevant to the records you are importing, and add a value to be added to all of the records without having to have the data in the spreadsheet. So if you have a lot of records that require the exact same data, you can avoid potentially tedious spreadsheet work by adding the data here instead. All records on the sheet will be given this same value, unless other data is specified for them in the spreadsheet. The spreadsheet data overrides this feature. Note that this is only available when adding new records, and not on an update.
After verifying the mapping, click Import in the bottom right.
The file will be imported, and you'll be presented with a Results page. You'll be alerted to successfully imported records, and any errors that may have occurred. If you do encounter any errors, Farmbrite will tell you to what's missing, or what might be causing an issue. If you think you have everything correct but are still receiving an error, reach out to us and we'll be glad to help!
Updating Records Through Import
The process for updating records via import is very similar to what we just saw. Instead of creating brand new records, you'll use a spreadsheet to make changes to existing ones. This time, rather than starting with the blank template, it might make sense to download your current records, and then edit the file with your updated information. You could use your own spreadsheet as well, but note that you need to supply an ID to match the existing records so Farmbrite knows which animal to associate the new data with. That can be either the ID, Tag Number, Electronic ID, or Internal ID. Those columns are all included in the downloaded export file, or can alternatively be found on the animal record in Farmbrite as well. Examples of both ways are shown below.
You might use this process to update current measurements, statuses, or tags. In our example below, we've updated the weight and height of our animals from a recent weigh in. Hot Tip: Note how we froze the columns in the spreadsheet so we could easily know what animal was in each row. We save the file as a .csv, and then go through the same steps to import the file as we saw in the section above. Be careful to select "Update Existing Records" when importing the file. Also, be aware that when working with livestock records, you have a Bulk Update From File choice, which automatically selects this for you.

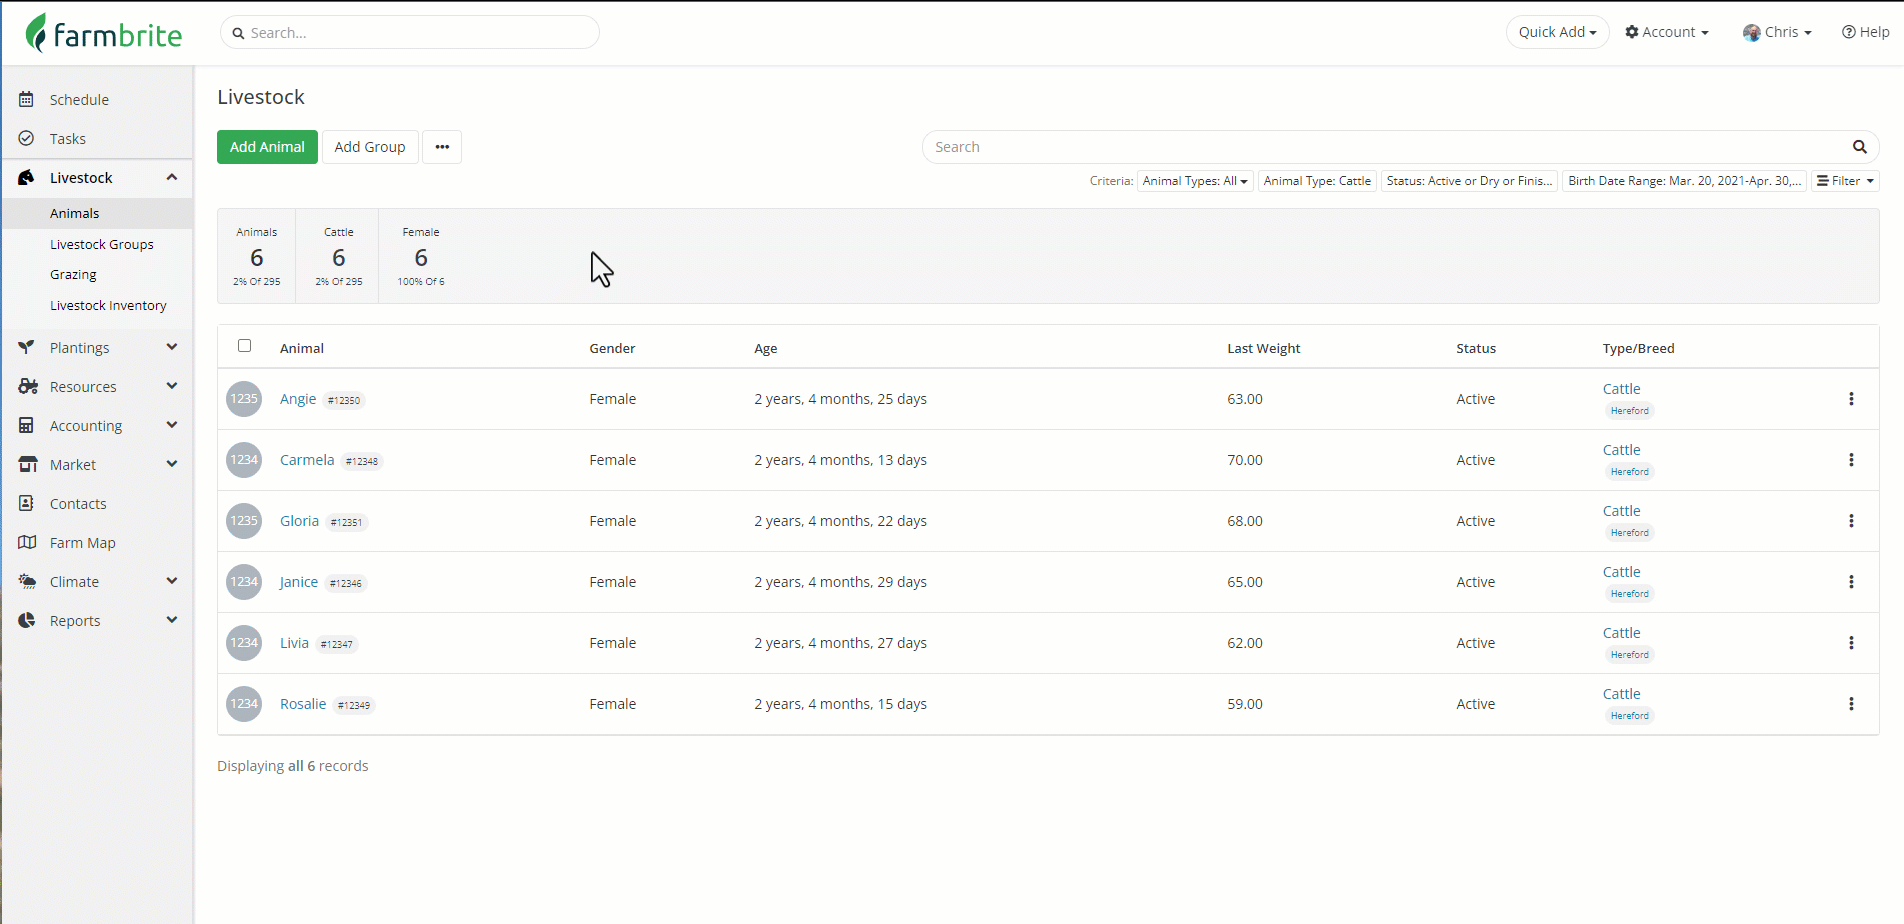
Our animals were updated successfully and we now have new measurement records for them for today.
If you need help with this process, please reach out to our support team. We will be glad to assist, and also offer importing your data as a professional service if you'd like us to process the imports for you.