Charging the correct taxes for your online sales has always been tough! Knowing local tax laws is difficult enough, but factor in shipping across state lines to other tax districts and the logistics are even more complicated. Now you can put those worries aside, as Farmbrite's integration with Stripe helps ease the burden of collecting sales tax by automatically integrating them into your online checkout. These Stripe calculated taxes are based on your customer's address, helping you ensure compliance with local tax laws. You'll have a few set up items to do in Farmbrite, and a few others to complete in Stripe to get this configured, but once it's up and running you'll have an easier time charging taxes which leads to an improved customer experience.
Note: If you would like to set up a basic rate to be charged on orders without taking your customer's location into account, check out this article.
To get started, navigate to the Market section, choose Settings, and then find the checkbox for Advanced Tax Calculation for Online Sales. Select it, and be sure to save. You must have a Stripe account connected to do this, and these taxes will only be automatically calculated on purchases made via credit card in your Online Store/Stripe Account.

Once enabled, you'll then find two new fields on your Products: Tax Behavior and Tax Category. You'll need to set these on each product before the online checkout will start collecting taxes. Check out this article for more information on editing existing products, and this one if you're creating new products.
Tax Behavior allows you to specify if the product's price includes tax already, or if tax should be added on top of the price.
Since different items might be taxed differently in different places, selecting a Tax Category helps Stripe determine what tax should be applied to this product. For example, tangible goods like produce and meats might be taxed, while services like a class or group event tickets may not, or may have a different rate. You can click the link for Tax Categories to the right of the field for more information about each category. Be sure to save after making your changes.

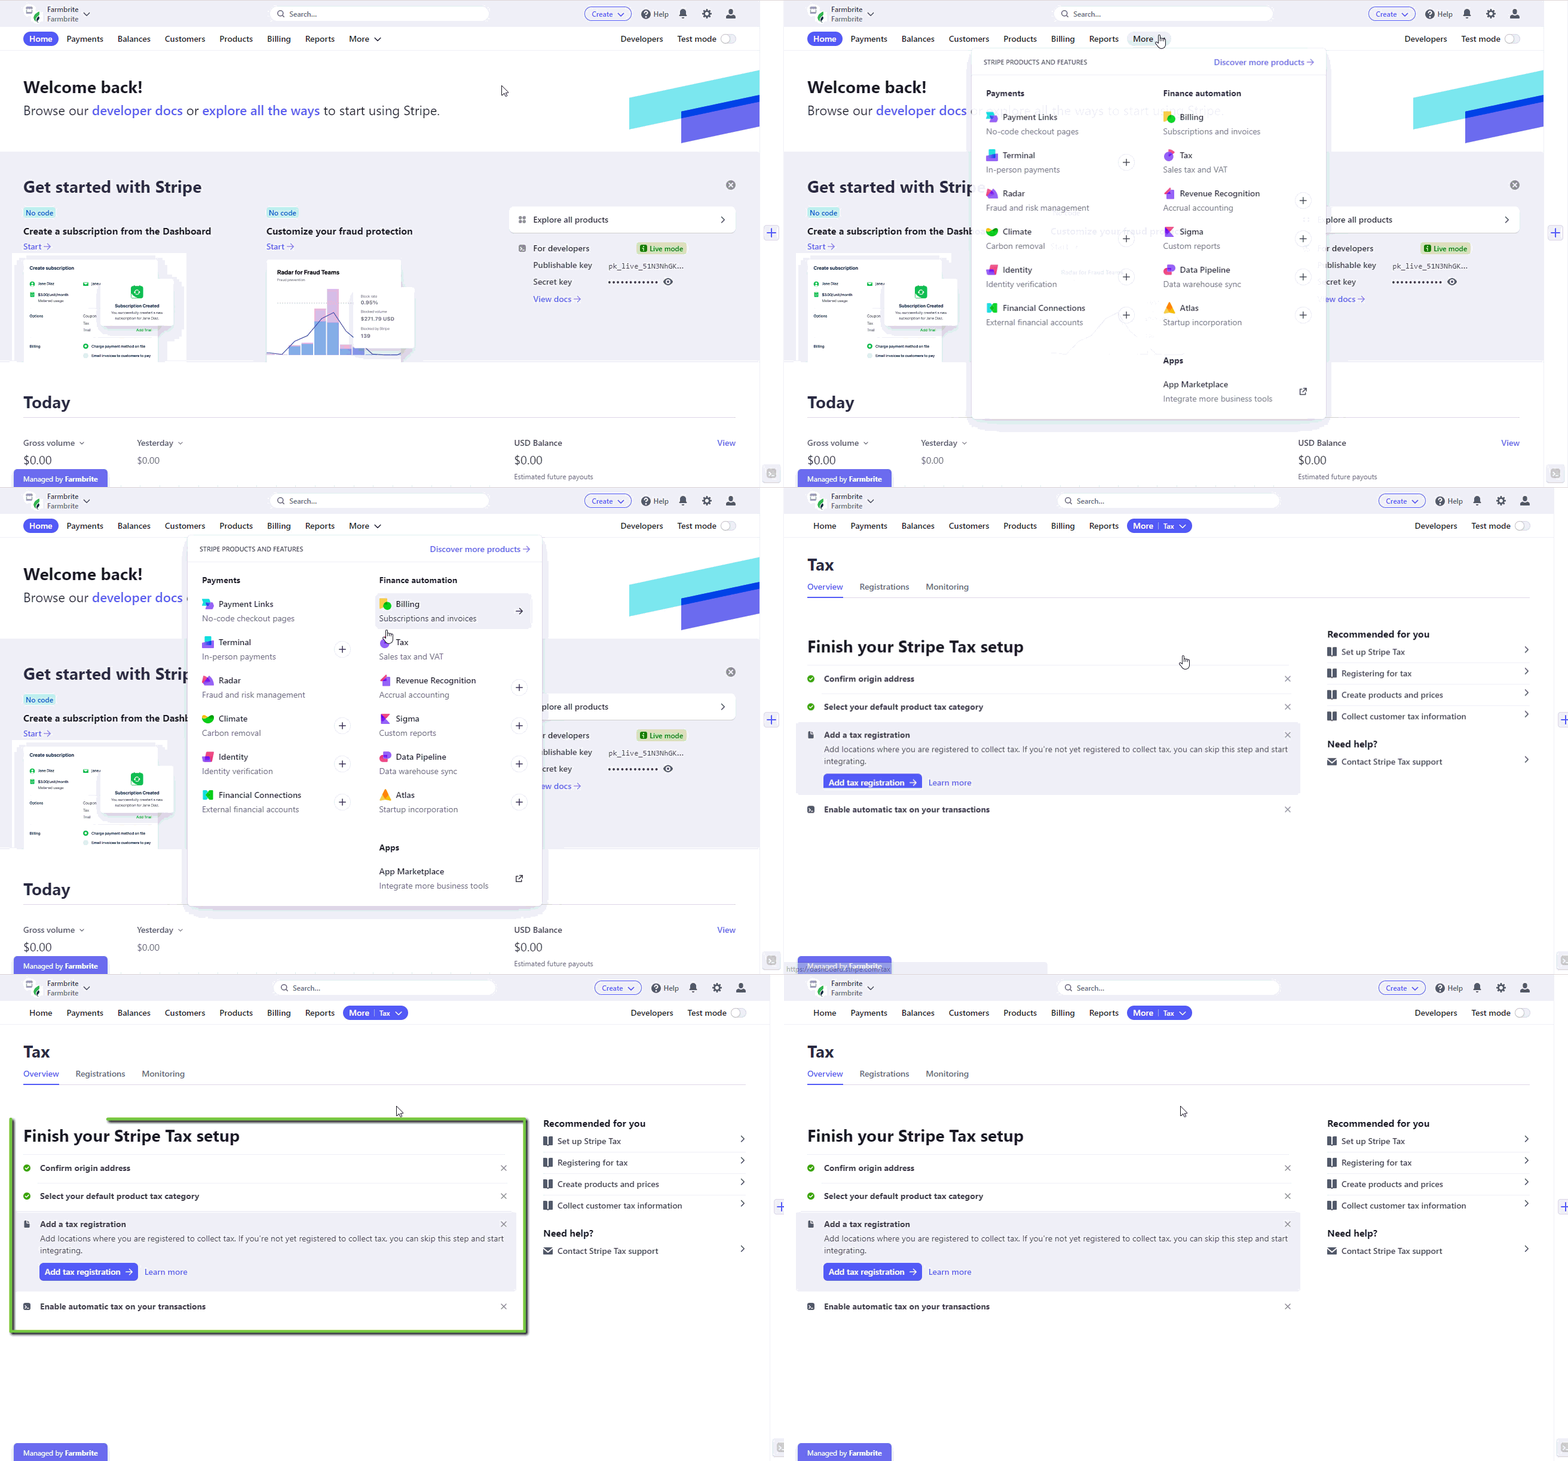
Beyond the set up in Farmbrite, you'll also need to make sure you have your taxes set up in Stripe as well. Stripe provides a full walkthrough of the steps to set up Stripe Tax in this article from their website. When you navigate to the Tax section under the More menu, you'll see a checklist of steps to complete as well. You'll need to confirm your address, select a default tax category, add a tax registration, and enable automatic taxes on transactions. The image below shows you how to navigate to that checklist and start ticking off your items, but we encourage you to read through the Stripe documentation for more details.

Be aware that you'll also need to create a default tax rate under the Products section; while Stripe will charge tax based on the location of your customer once the rest of the set up steps are enabled, this default/generic rate needs to be added for the taxes to be connected to Farmbrite. This step is critical; if you get an error when trying to enable your taxes in Farmbrite, be sure to double check this step.

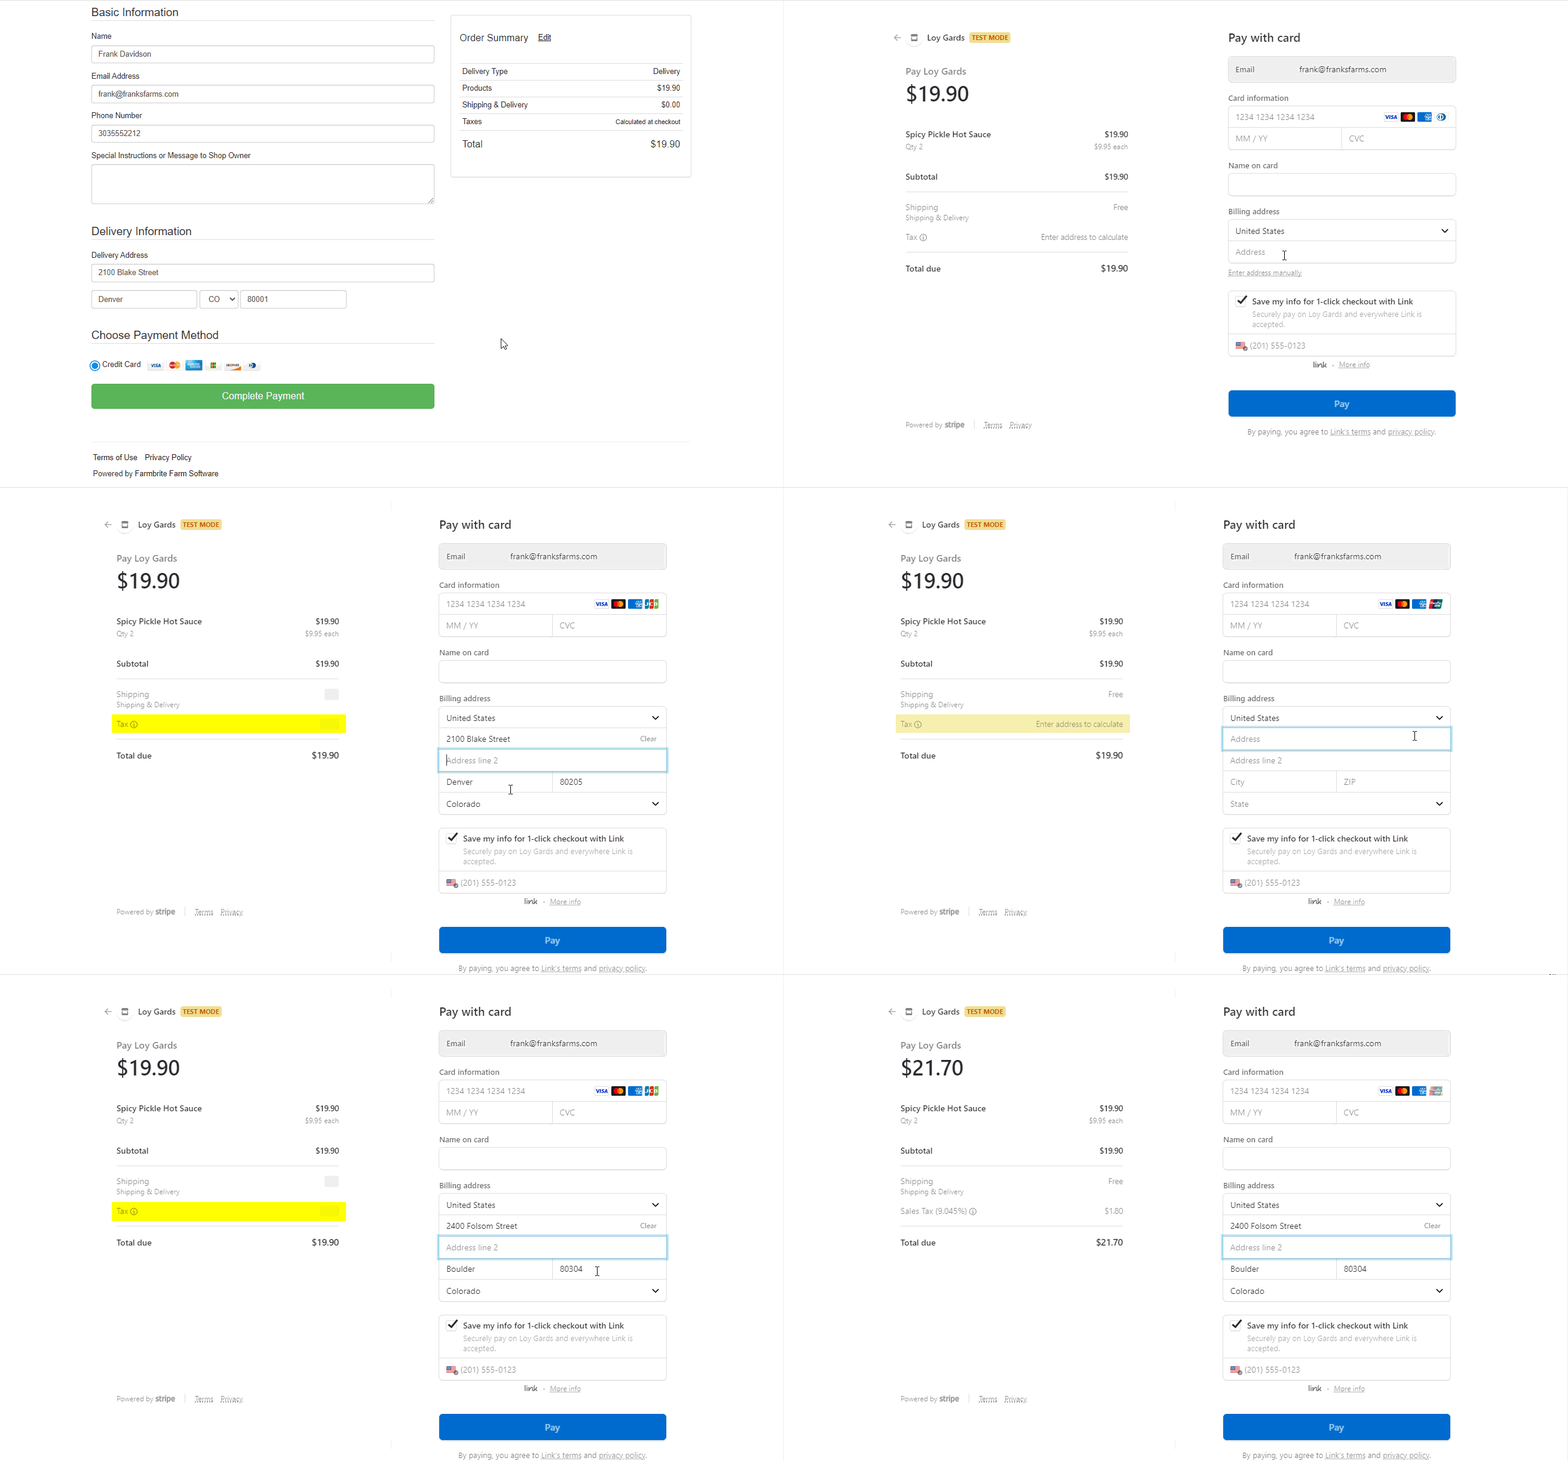
Once you've completed the steps in Farmbrite and in Stripe, you can test your checkout to see it calculating taxes. Note that the tax in the checkout is calculated based on the billing address of the customer; check out how Stripe knows to charge different taxes based on the different city supplied in the image below. The Denver rate (8.81%) is slightly lower that the Boulder rate (9.045%). The combination of your tax category associated with your product and the customer address supplied let's Stripe make accurate tax assessments on the order.

After the customer completes their order, it is shown in your Farmbrite account under the Orders tab, with the correct taxes associated as well.
It's important to note that this feature for automatic tax calculations only applies for online credits card payments. Be aware that you can still add taxes manually to any orders you process over the phone or in person. When creating the order, you can still use the Farmbrite taxes field to add whatever taxes you need. This lets you still track taxes for cash, check or PO Payments you take outside of your Stripe online credit card payments. You can also set up Basic tax Rates if you prefer.
Questions about this? Reach out to us and ask; we are glad to help!