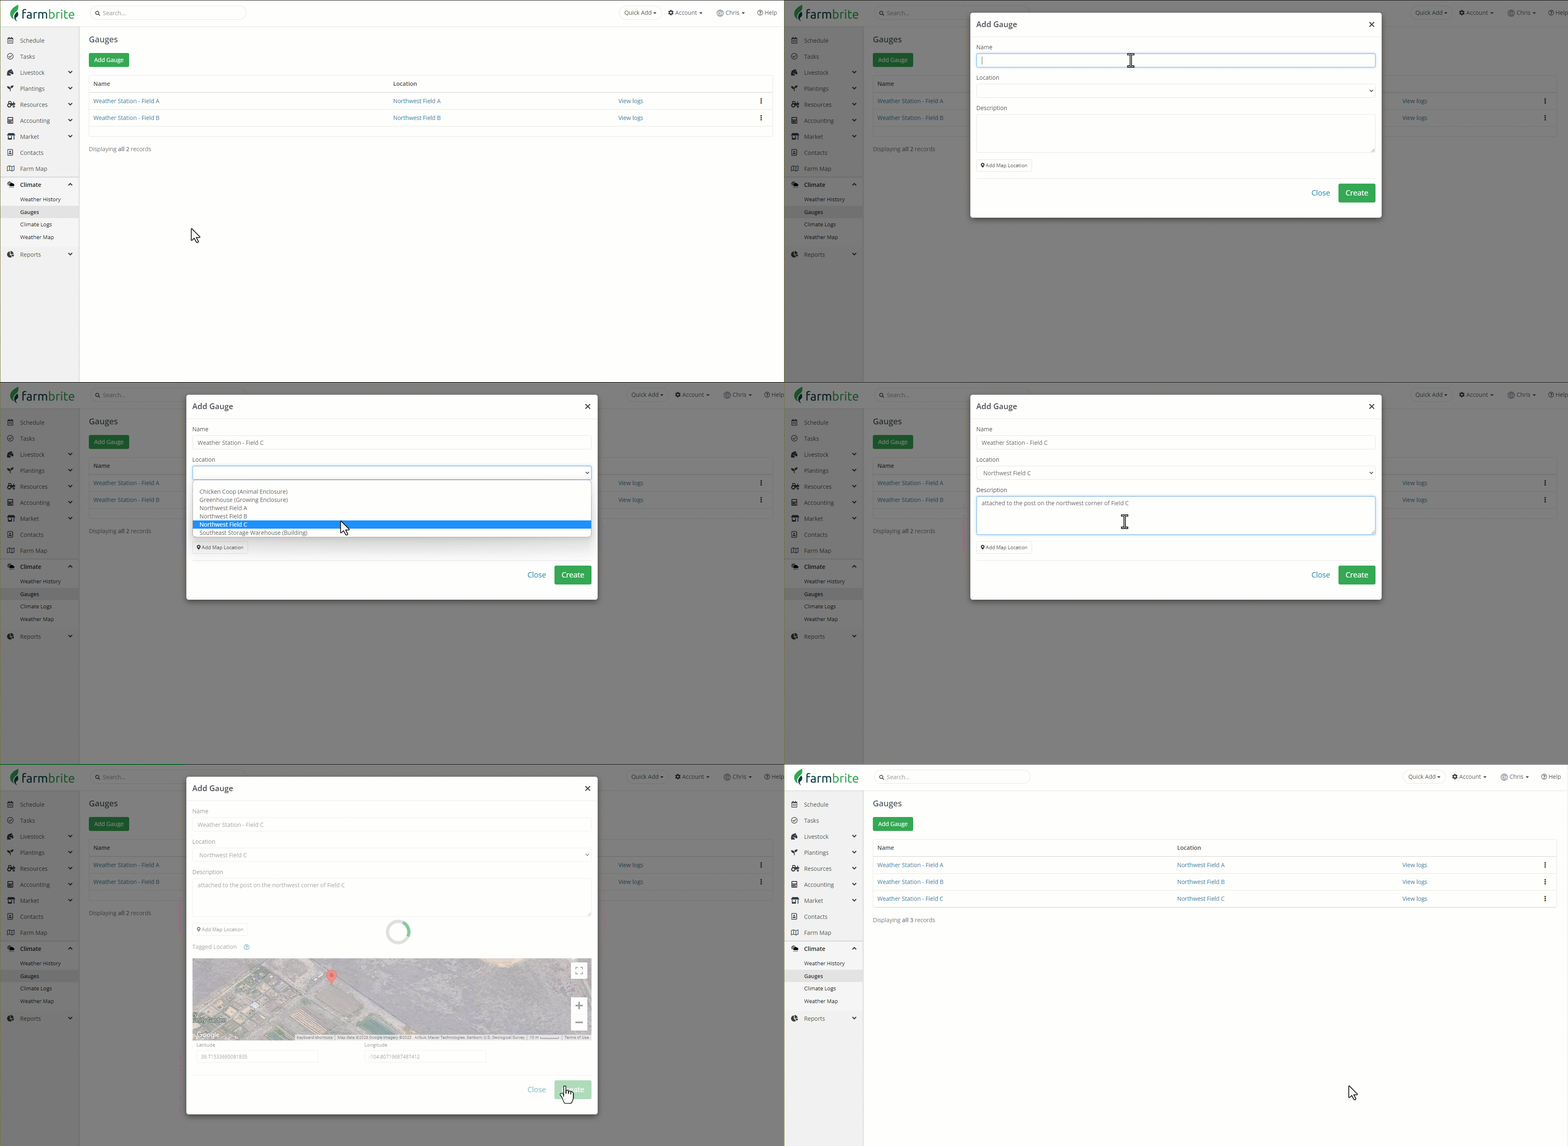
You know you can view all kinds of data from external sources like NASA and NOAA, but having the raw data from your piece of property is probably crucial for your operation. To track this in Farmbrite, you'll set up a gauge. Think of this as a weather station or some type of measurement meter in a specific location. This might be out in a field, attached to a building, or associated with a specific animal enclosure like a coop or barn. You'll take readings from the meter and add them to Farmbrite so you can track and chart the data over time. This lets you observe trends, look for anomalies, and be better prepared to handle weather events overall.
To get started, navigate to Climate, and choose Gauges. Any existing gauges will be displayed here. You can add a new one by choosing Add Gauge. A new window will open asking you to supply a name, location, and description.
The location menu lets you chose from existing grazing locations, fields, animal enclosures, grow enclosures, and buildings. If you've mapped them on your farm map before, they'll be listed here for you to select. You can also optionally use GPS geolocation to add a map pinpoint for the gauge. You can drag the pin around to place it in the exact location of your gauge if you need.
Click Create, and the gauge has been added.

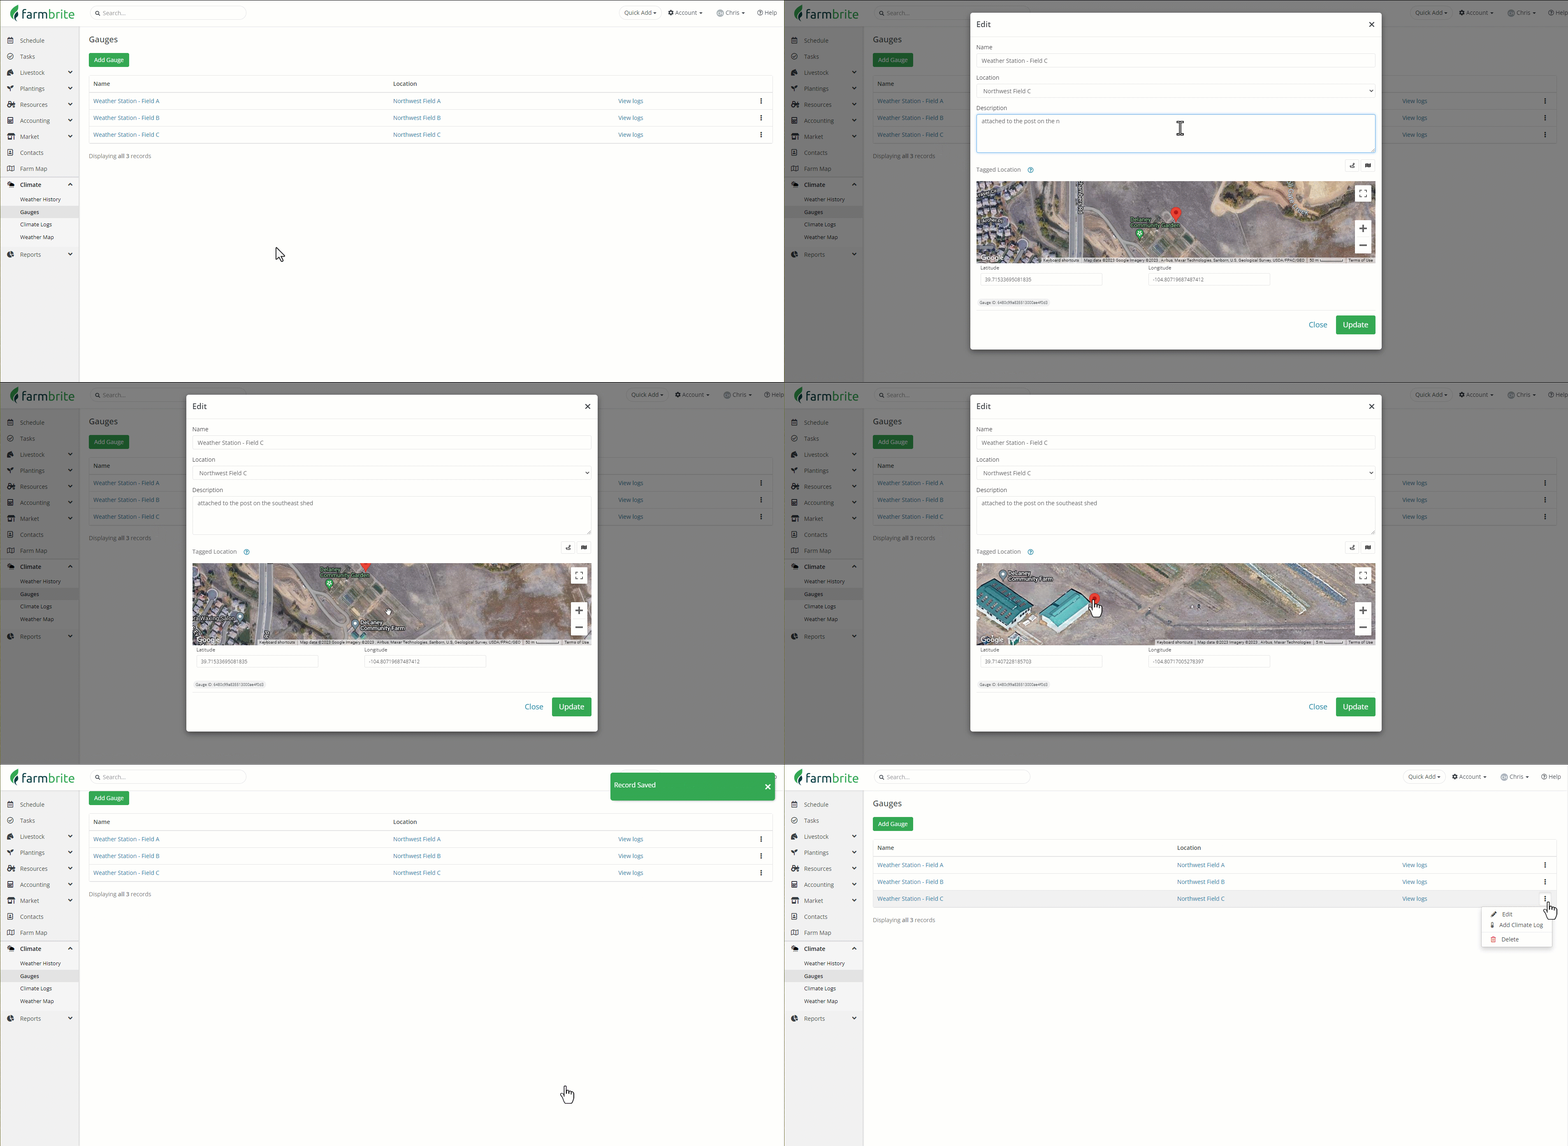
If you need to edit the details for a gauge, just click it's name. The same window will pop up allow you to make changes. Perhaps you moved it to a different location out of the sun to get more accurate temperature readings.

Also note the Gauge ID in the bottom of the edit window; you'll need this if you're going to import climate logs.
You can also click the Actions Menu (3 Dots) to edit or delete the gauge, or record a Climate Log. But there is a whole separate article for adding logs, so move on to that one to learn much more about it!