Using the Filters in Farmbrite
Filtering is a way to sort your data within Farmbrite to find just what you're looking for. Maybe you just want to see a specific breed or animal type in your livestock section, or need to find unique transactions in individual categories when running accounting reports. You'll find the ability to filter data for your livestock, accounting transactions, markets orders, and more. You can always create custom reports with additional filters as well. We'll show an example below for livestock, but the general idea can be applied across the system.
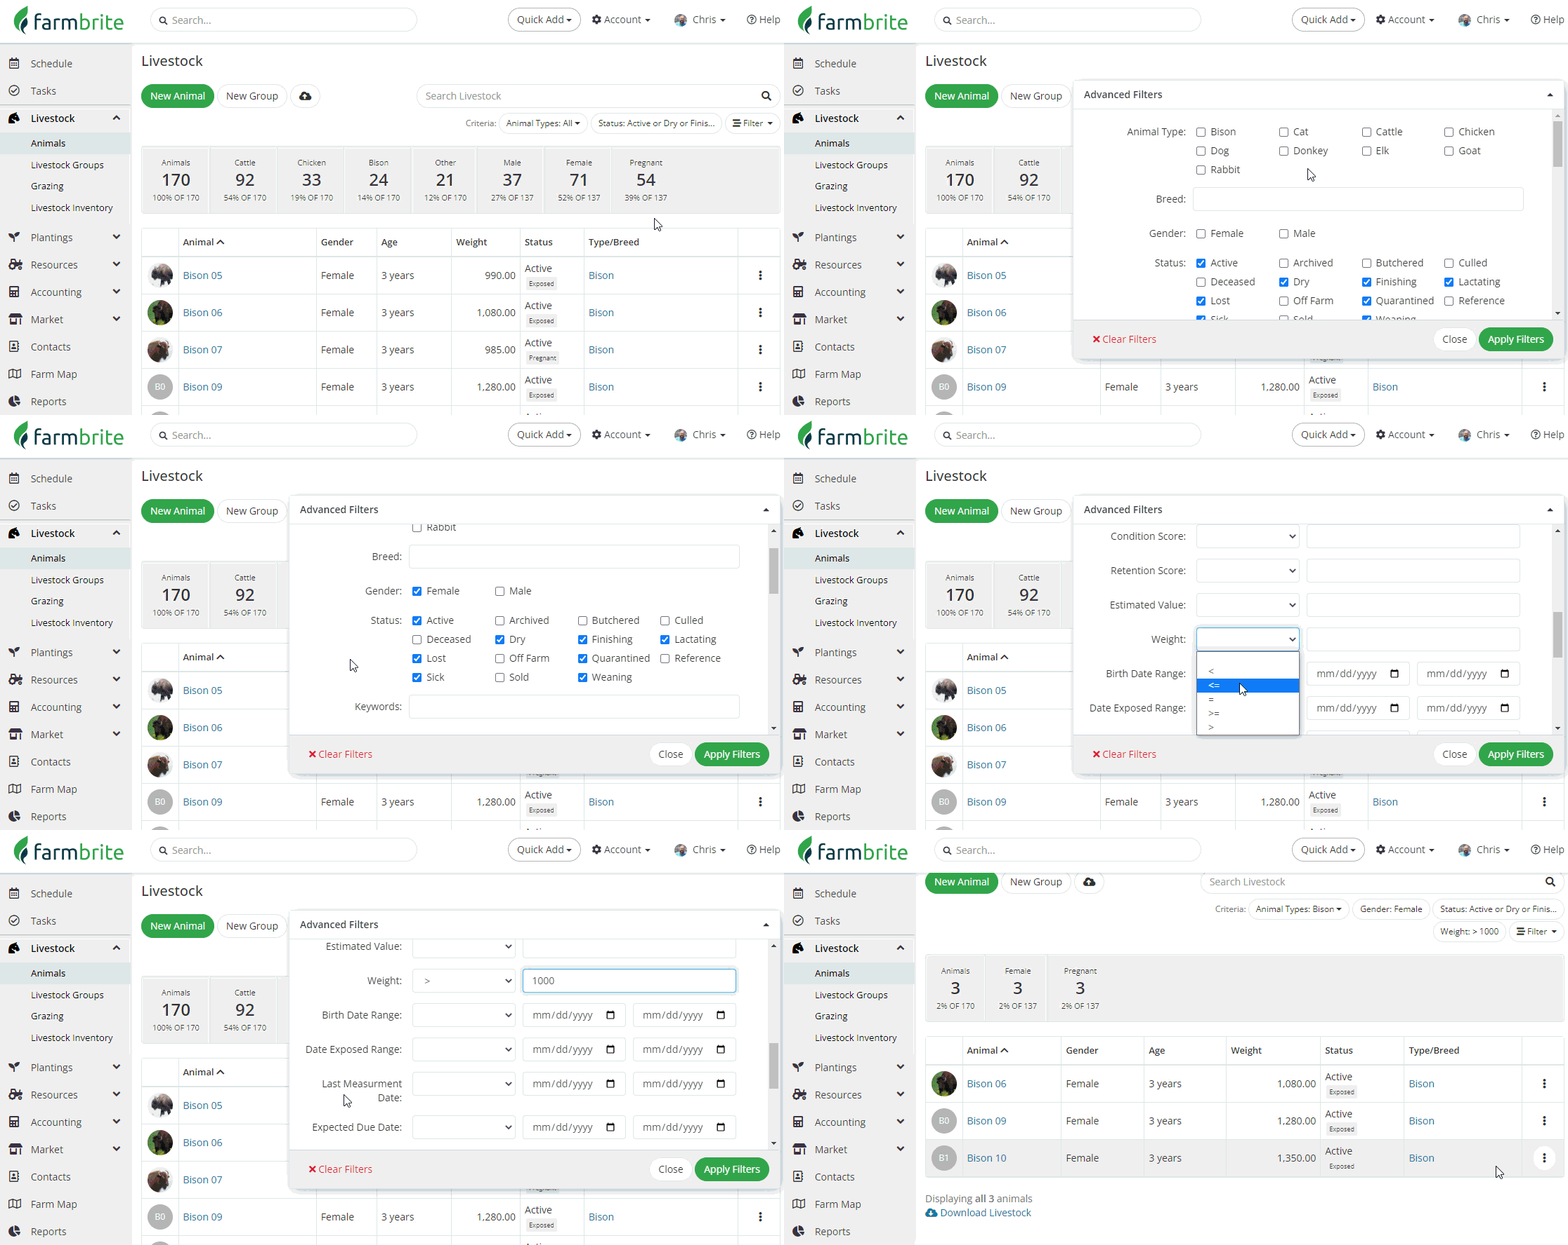
When you navigate to Livestock, you'll be brought to a page displaying all your animals by default. Look to the right under the search text box you will find a button for "Filters". Click this and it will open up many fields for you to select to filter your data. You can set search criteria like breeding status, keywords, animal type, breed, withdrawal date, date of birth, and much more. Some might be checkboxes for you to make a specific selection, and others give you the opportunity to find values greater than/less than, or dates within a certain range. In our example below we are searching our livestock for female bison that are greater than 1,000 pounds. Check out all the available options as we scroll through the menu and think about how you might use a combination of them to find just the animals that meet an exact criteria. After making your selections, apply the search and Farmbrite will filter your data. The page will refresh and you'll see only the animals that meet the filter criteria.

If you need to start over, you can simply click "Clear filters" and to reselect whatever filters you need or see all your animals again.
Hot Tip: If you've created a Smart Group for your animals, it may be easiest to select that group from your filters as you may have already included some of filters when creating the group!