Once you have a gauge added to Farmbrite, you can start recording data from it to track trends over time. The information is added per each individual gauge, so you can track the key data points at specific locations around your property. You might have different animal or growing enclosures that require unique environmental conditions, and you can easily track the data points for each one separately. You also might have different fields around your property, or remote locations that have different weather patterns than your main acreage. Or maybe you just have a single weather station at your ranch house that gets you all the data you need. However you track your weather data, you can easily add the information to Farmbrite by navigating to Climate>Climate Logs.
From there, you'll have a button to Add Climate Log. You'll first be asked to choose one of your gauges, and supply a date the measurement was taken. After that, you can add any key climate data points that you want to record for that gauge and date. These are all optional; add what is important for you and skip the ones you don't track.
- Precipitation
- Temperature
- You can also/alternatively add a minimum and maximum temperature to the log. This may be helpful if you are creating one log per day. The minimum and maximum will still be charted, and the software will determine an average to display as well.
- Soil Temperature
- Precipitation
- Moisture
- Humidity
- Light Level
- C02
- Wind Speed
You can also add a brief description to the log, maybe something like "partly cloudy with scattered thunder storms in the afternoon".
Once you've added everything you need, click Create.
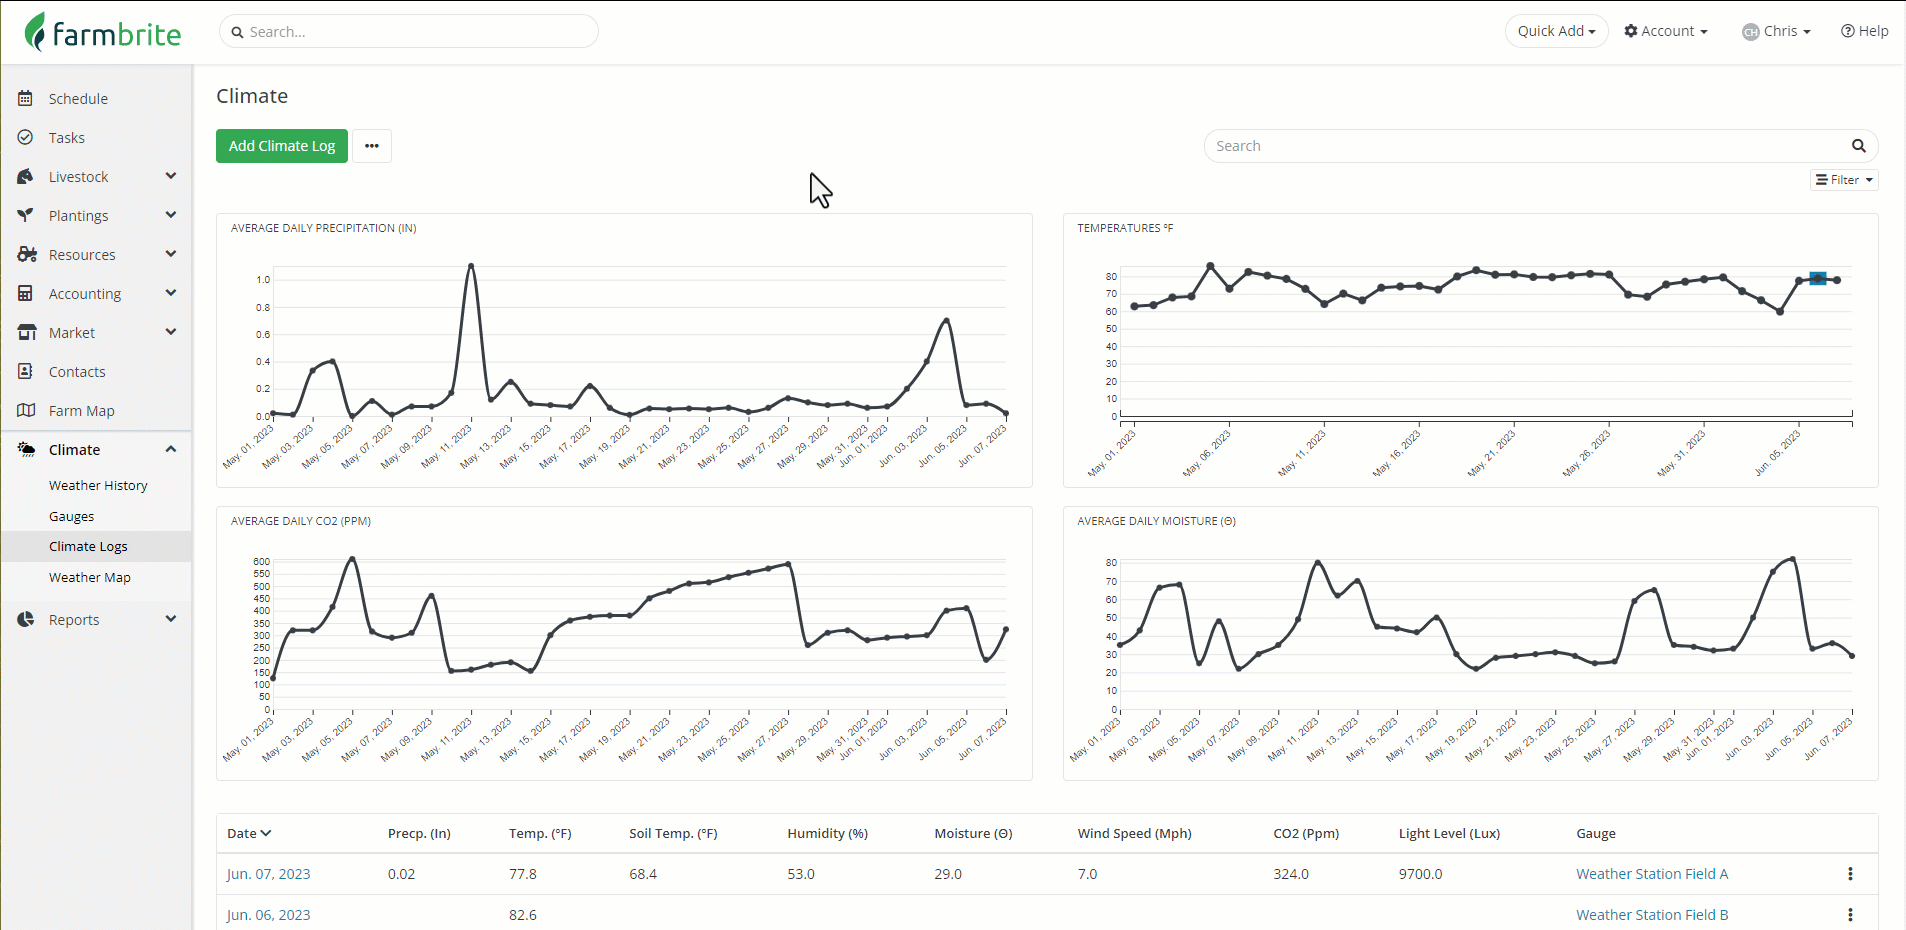
After adding the data for the gauge, you'll see it graphed on the main Climate Logs page.
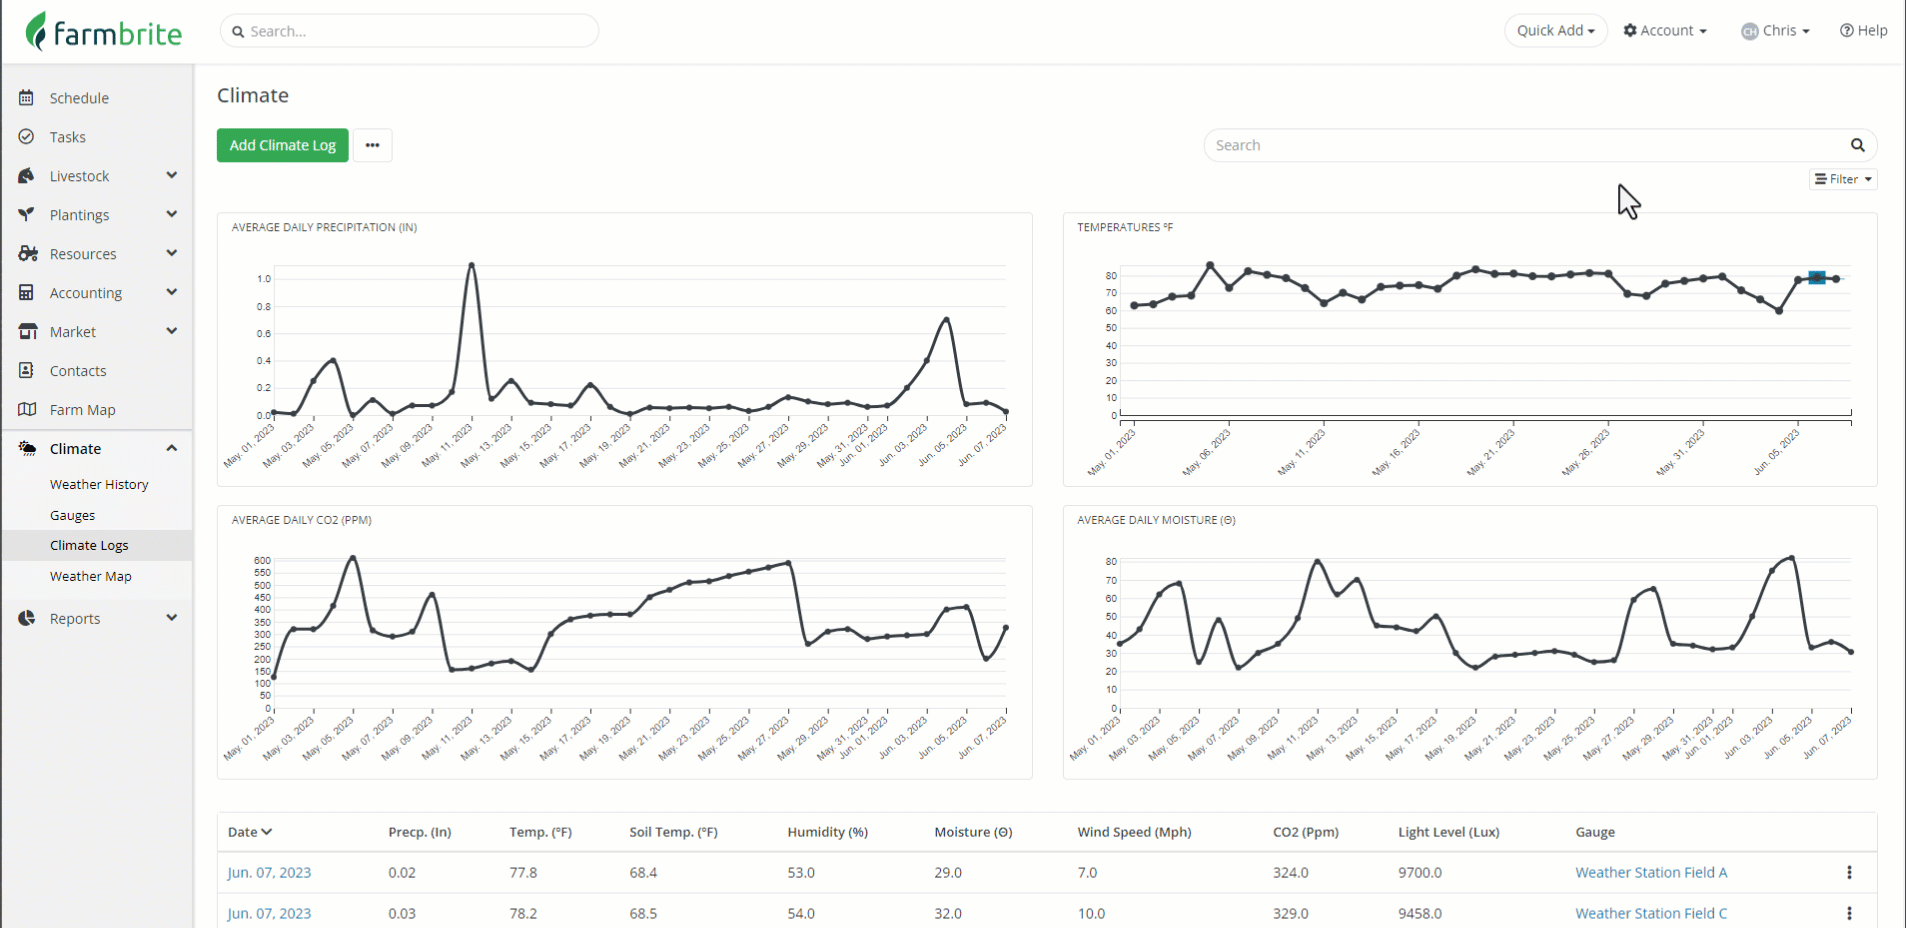
Four graphs are presented, giving you a visual representation of Average Daily Precipitation, Temperature, Average Daily CO2, and Average Daily Moisture. You can hover over the graph to see specific data points, and if you have multiple readings on a single date they'll be shown as an average as well. In our example below, note the two highlighted logs on June 6th, with the temperature chart showing both the low and high that day, as well as the average. You can hover your cursor on the point to get the average, or the box to get the range.
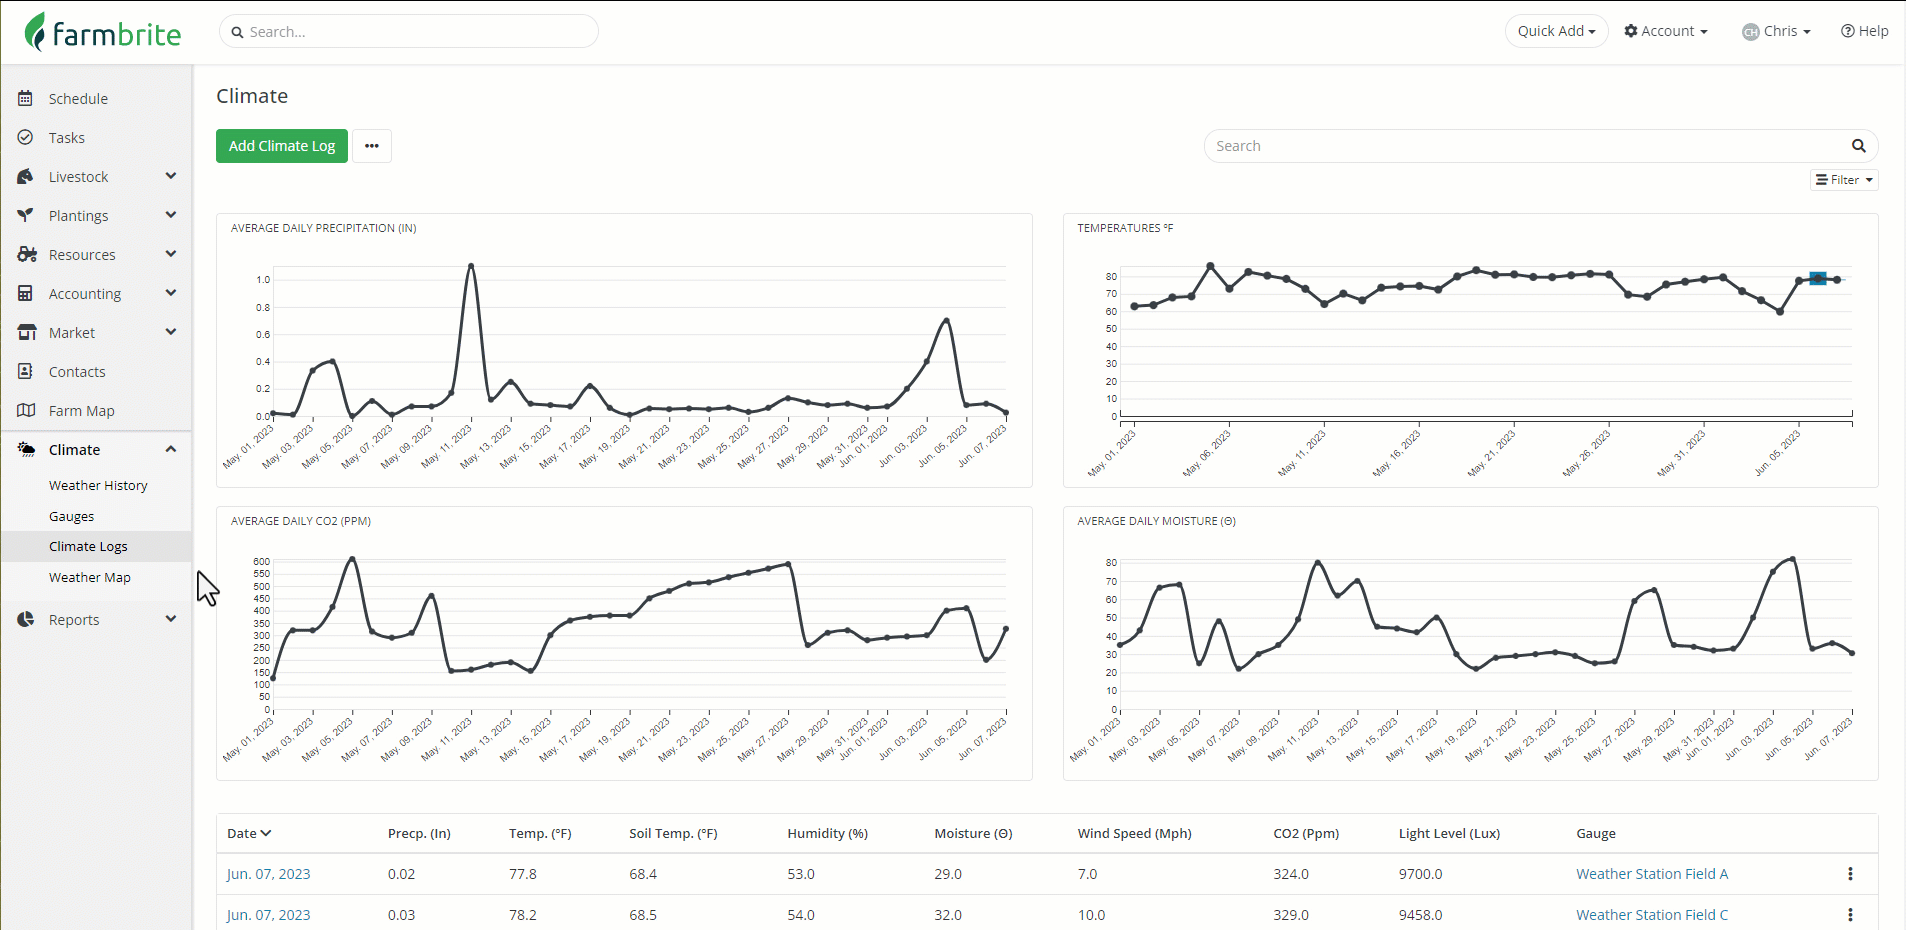
You can also filter your logs to update the graphs. Click Filter, and limit your results by date, precipitation amount, temperature, or the gauge used. Clicking the column headers will sort the report by the data in that column too.
In the image below, we first filter to see just the records from this current month. Then we clear the filters to start fresh, and filter to see only records where the measured precipitation is greater than .2 inches. Clicking the column header gets us the wettest day at the top; May 11th was a downpour in Field A! Think about how you can combine all these filters to find specific data that will help you see trends and prepare for the next monsoon.
If you need to edit your climate log, just click on the date from the table, change what you need, and click Update. You can also delete records using the Actions Menu (3 Dots) and selecting delete. Be careful though, once deleted these records cannot be recovered.
If you have a lot of data to add, you can also import it from a spreadsheet. Move on to the next article in this category to learn more about that.