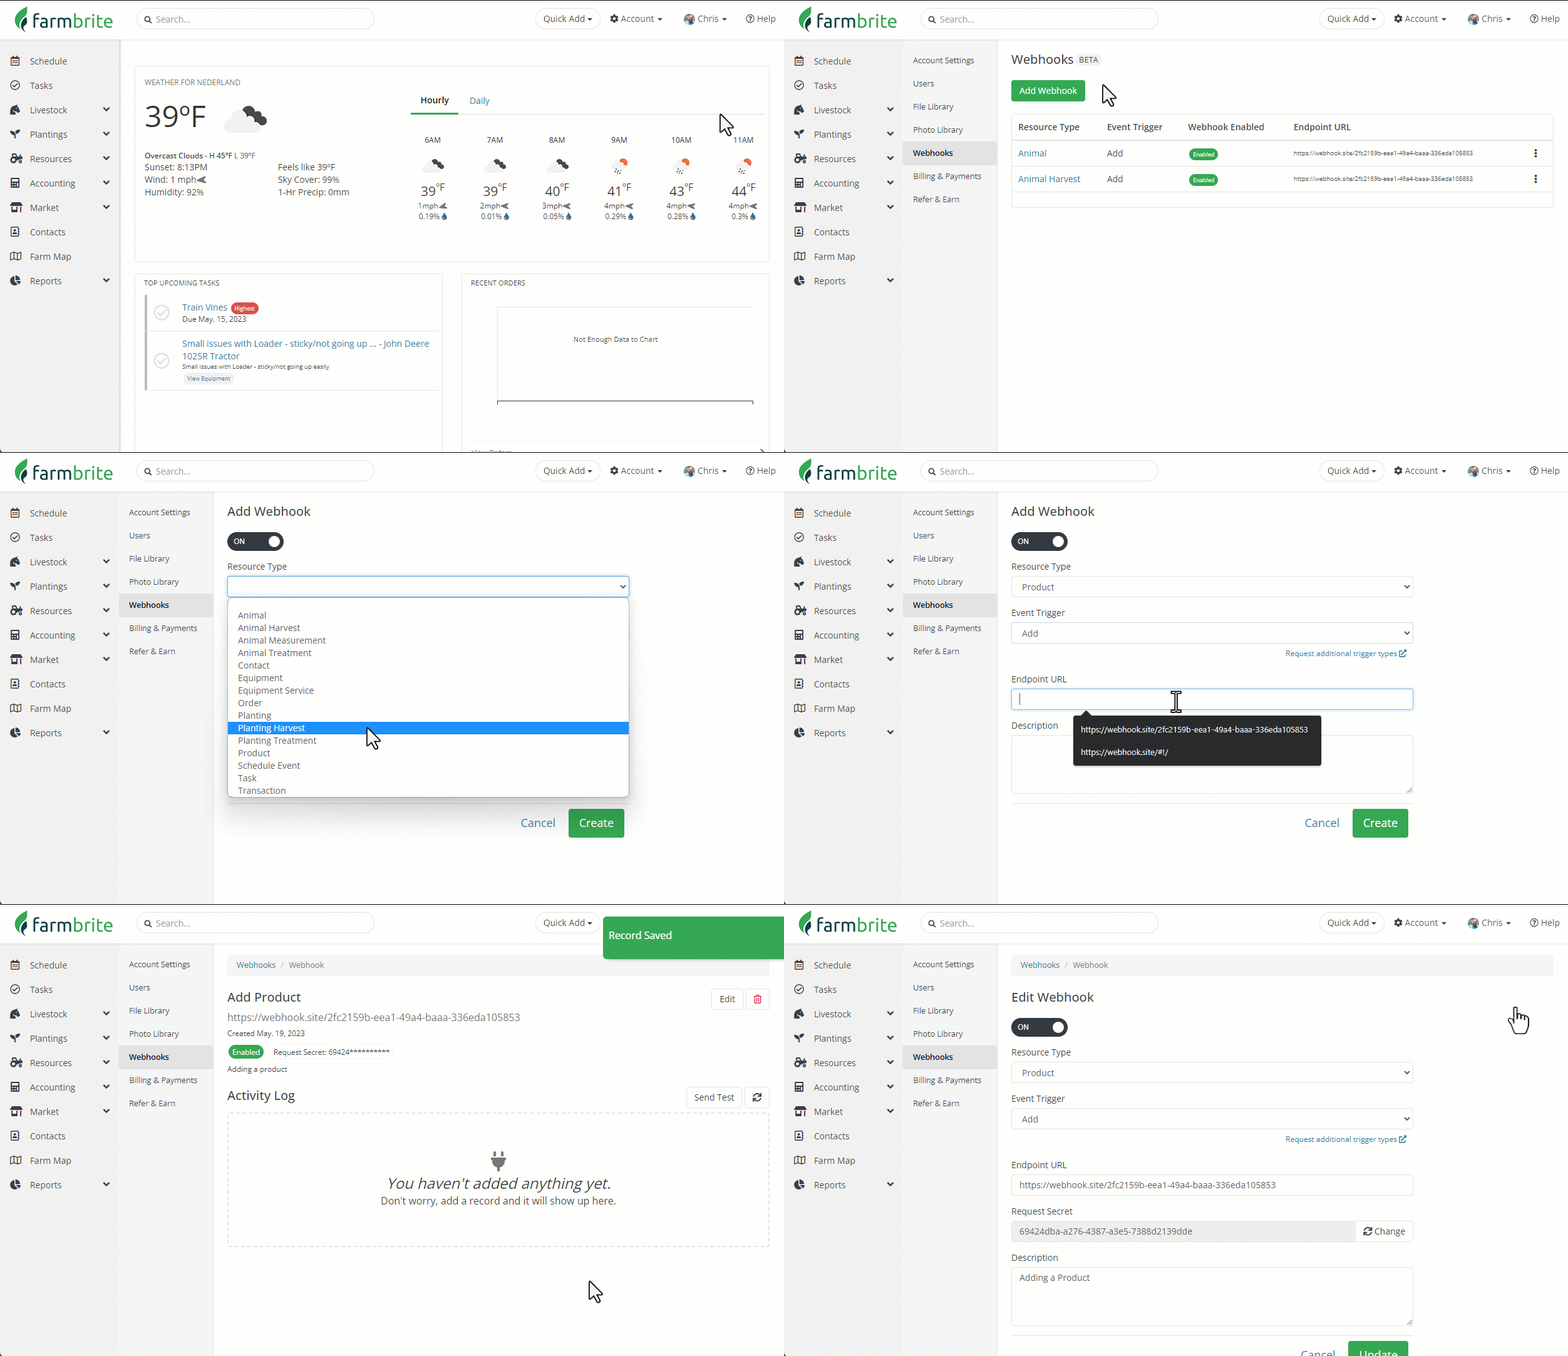
Webhooks are an automated way to send data from Farmbrite to another system. They allow your Farmbrite account to connect to another app, and then send information when a specific trigger occurs. For example, you might sent data to Shopify when a new product is added or updated, or a new order is submitted. For more information on what these are and how you might use them, check out this article from Zapier.com explaining the basics. Within Farmbrite, you'll be able to define an area of system data to work with, and set a trigger so that the data is sent just when you need it. You'll also define where the data is sent to. You can set up as many of these as you need to cover all your bases.
Note that this feature is only available on our Plus and Premium Plans.
To set up a webhook, navigate to the Account menu, and then select Webhooks. Click the button to Add Webhook and a new page will open for you to supply information about it.
Event Trigger - Choose what action will trigger the webhook. This could be add, remove, or update.
Endpoint URL - Where should the data be sent?
Description - Internal for Farmbrite and not passed to the endpoint URL, you can optionally supply information about what this webhook is used for.
After adding this information, click Create Webhook. You'll immediately see a Request Secret; click Edit to see this unencrypted and use it to authorize the data being sent. Request Secrets are unique per webhook and can be a valuable way to ensure that the request you received came from Farmbrite. If you need to change the Request Secret in the future, you can refresh it to generate a new one, just be sure to update your receiving application to accept the new secret (if applicable).

Selecting the webhook from the main page will show you a history of the last 30 days of activity, and allow you to resend any request again. You could also send a test if you'd like to be sure it's connected correctly.
Webhooks will submit data to your specified endpoint URL as a POST of JSON data. That payload will vary depending on the resource event trigger type and associated resource, but should look similar to the following:
{
  "id": "{Webhook Request ID}",
  "event": "{Trigger Type}",
  "is_test_data": false,
  "created_at": "{DateTime sent}",
  "object": {
    "type": "{Resource type}",
    "id": "{Resource ID}",
    "record_id": "{Related record ID if applicable}",
    "data": { // JSON data for resource triggering webhook event
      "id": "{Resource ID}",
      ...
    }
  }
}
If you no longer want to use the webhook, you can toggle it off to disable it. Be aware that any webhook that fails 1000 times overall, or 100 times within a 7 day period, will be automatically disabled. When a webhook is disabled based on failures the primary email address on your account will receive an email notification that the webhook was automatically disabled.