Farmbrite has many customizable features to help meet the needs of your agricultural business. There are all types of settings, configurations, and options to tailor it to your requirements. Along with those, you'll also be able to create custom fields to track the data that is unique to your operation to further customize the software. You can even filter the custom fields to only show up on animals and crops that meet specific criteria. Perhaps you have a measurement that is specific to a certain animal type, or a need to track a unique attribute on a crop harvest that only applies to specific crop types. You'll have many options to get just want you're looking for.
Note: Custom fields are only available on Farmbrite's Plus and Premium Plans. Learn more about upgrading here.
You can create custom fields to track data on the following record types:
- Livestock
- Livestock Treatments
- Livestock Yields
- Livestock Measurements
- Equipment
- Crop Types
- Plantings
- Planting Treatments
- Planting Harvests
- Grow Location Treatments
You can use custom fields to store data in different ways. The choice is yours; depending on what data you are storing, you might find textboxes, multi-select checkboxes, or dropdowns useful. Or, maybe you'd like a large paragraph box to take notes, or a simple date or number field.
- Number - Only accepts numeric values, no alpha characters.
- Dropdown - Select a single option from a menu of predetermined options.
- MultiSelect - Select more than one option from a menu of predetermined options.
- Yes/No - A true/false section with the preloaded options for Yes and No.
- Text - A single line textbox to capture a small amount of text.
- Paragraph - A larger text box with more room to write.
- Date - Only accepts a date and displays a calendar to pick from.
The image below shows you examples of each type of field and what it will look like.
Creating Custom Fields
To begin creating custom fields, navigate to Settings and choose Custom Fields. From there, you can click the button to Add Custom Field. Then you can supply the details to create your custom field.
- Give the field a name - This will be displayed when filling out the fields and on reports and exports.
- Choose what type of record it should be shown on.
- Select what type of field you want to use.
- Optional: add a description of how you plan to use this field or what will be tracked with it.
- Optional: filter the field to only be shown on particular records based on specific criteria.
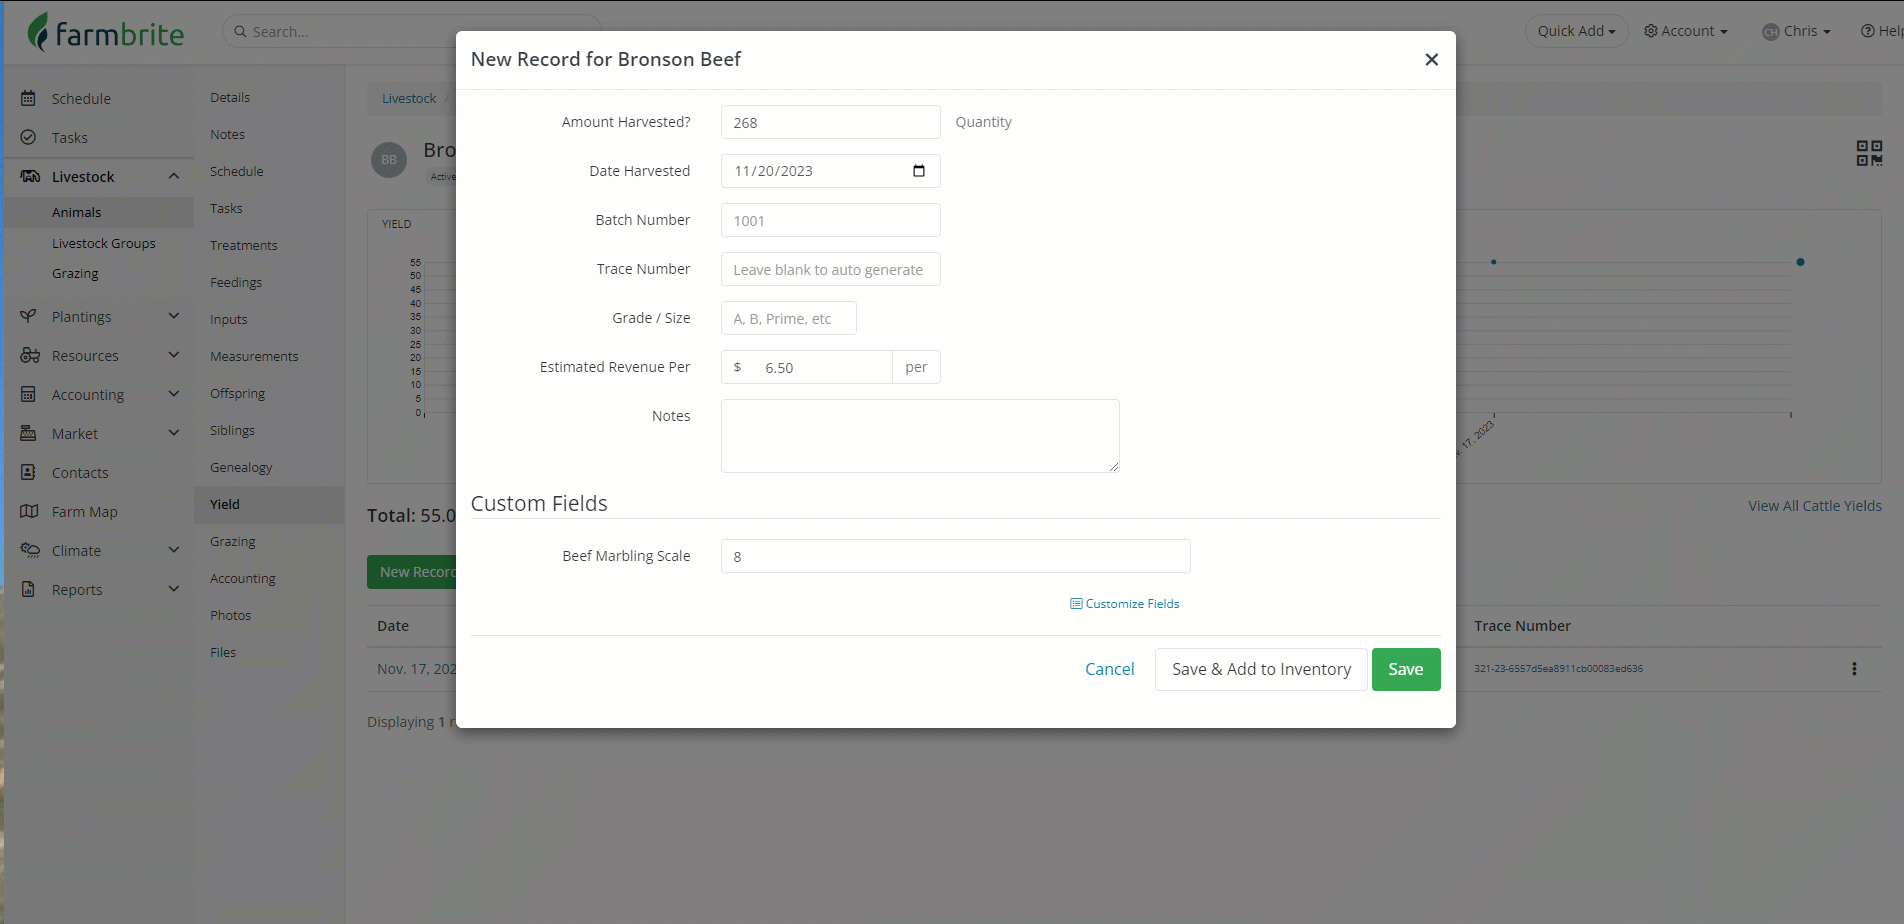
In the example above we have created a custom field to track the marbling quality of our cattle harvests. We used a number field as we only want numeric entries, and set a filter to have it only shown on cattle. Be aware that the filters presented are unique to the record type chosen. For example, since we are working with livestock we see things like birthdate, weight, and gender to filter on. If we were working with crops, we could filter by crop type, date planted, growth stage, and a lot more.
Note that the number of fields you can create varies by plan type. For Plus plans you can create 10, for Premium you'll have 100. You can see how many you've used in the bottom left corner of the custom fields page (shown above as 14/100).
Using Custom Fields
The custom fields you create will be shown on the record type you selected, as long as the record meets the filter criteria you configured. You can supply data for them on each record. You can edit existing records to add the data, and also add it on brand new records as well. You could even import your custom field data if you had a lot to add at once.
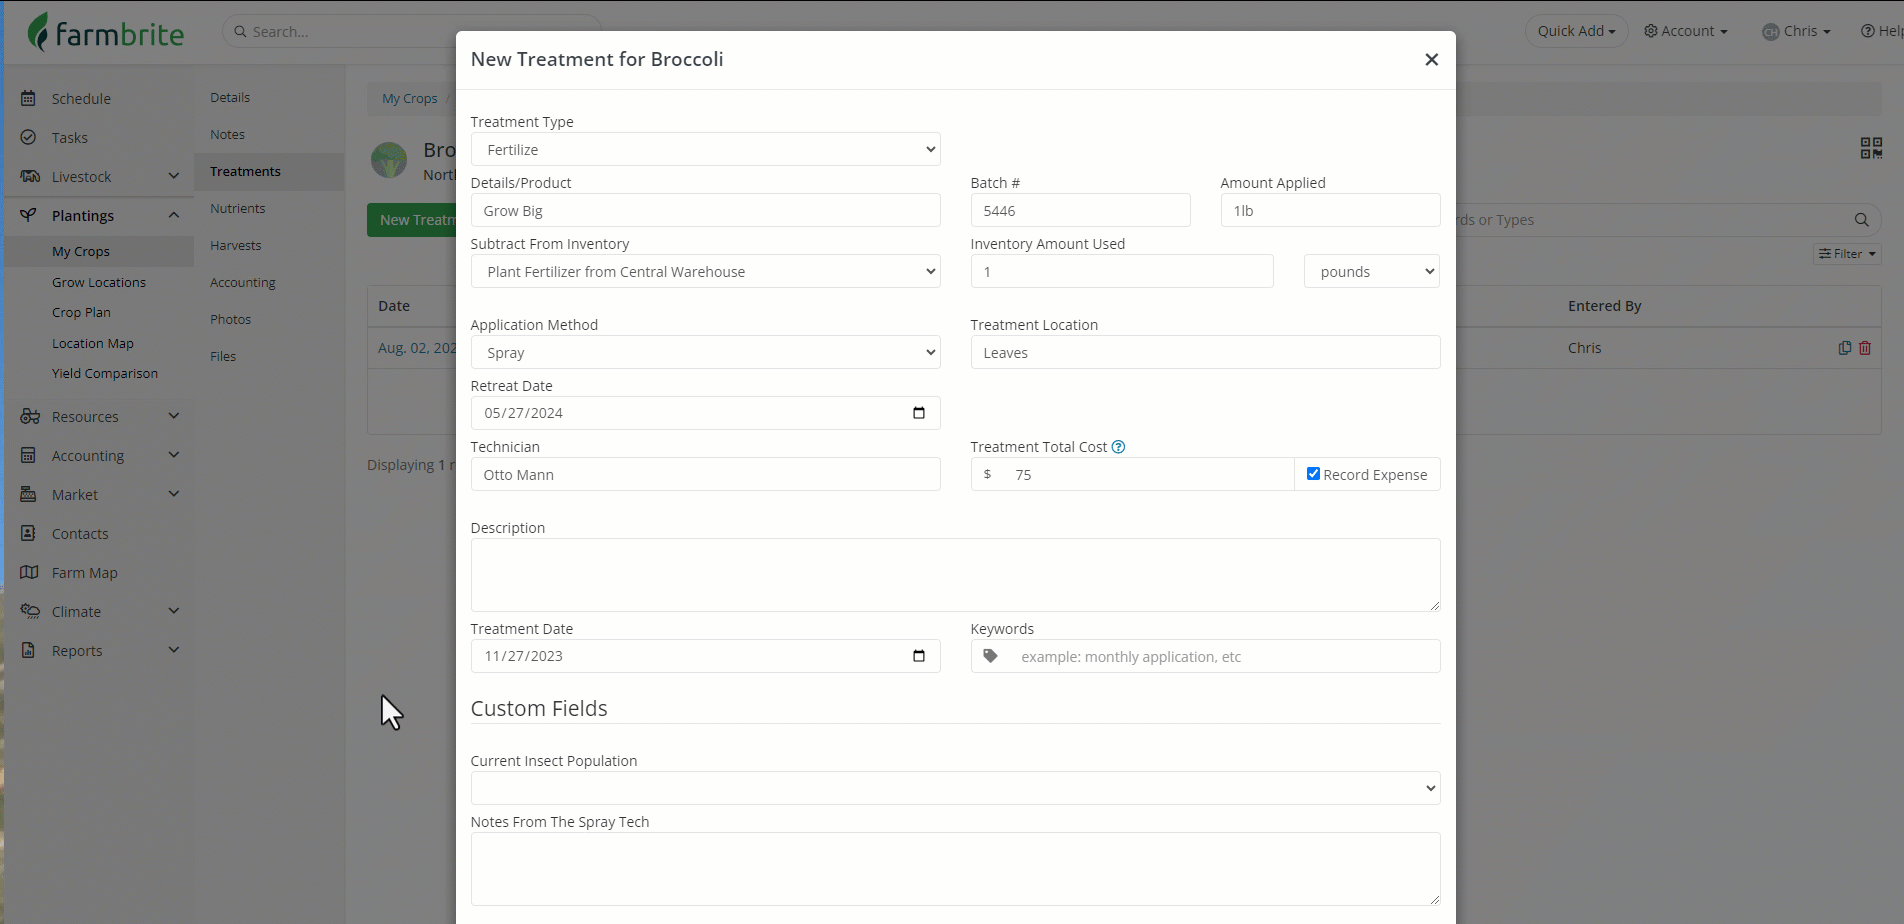
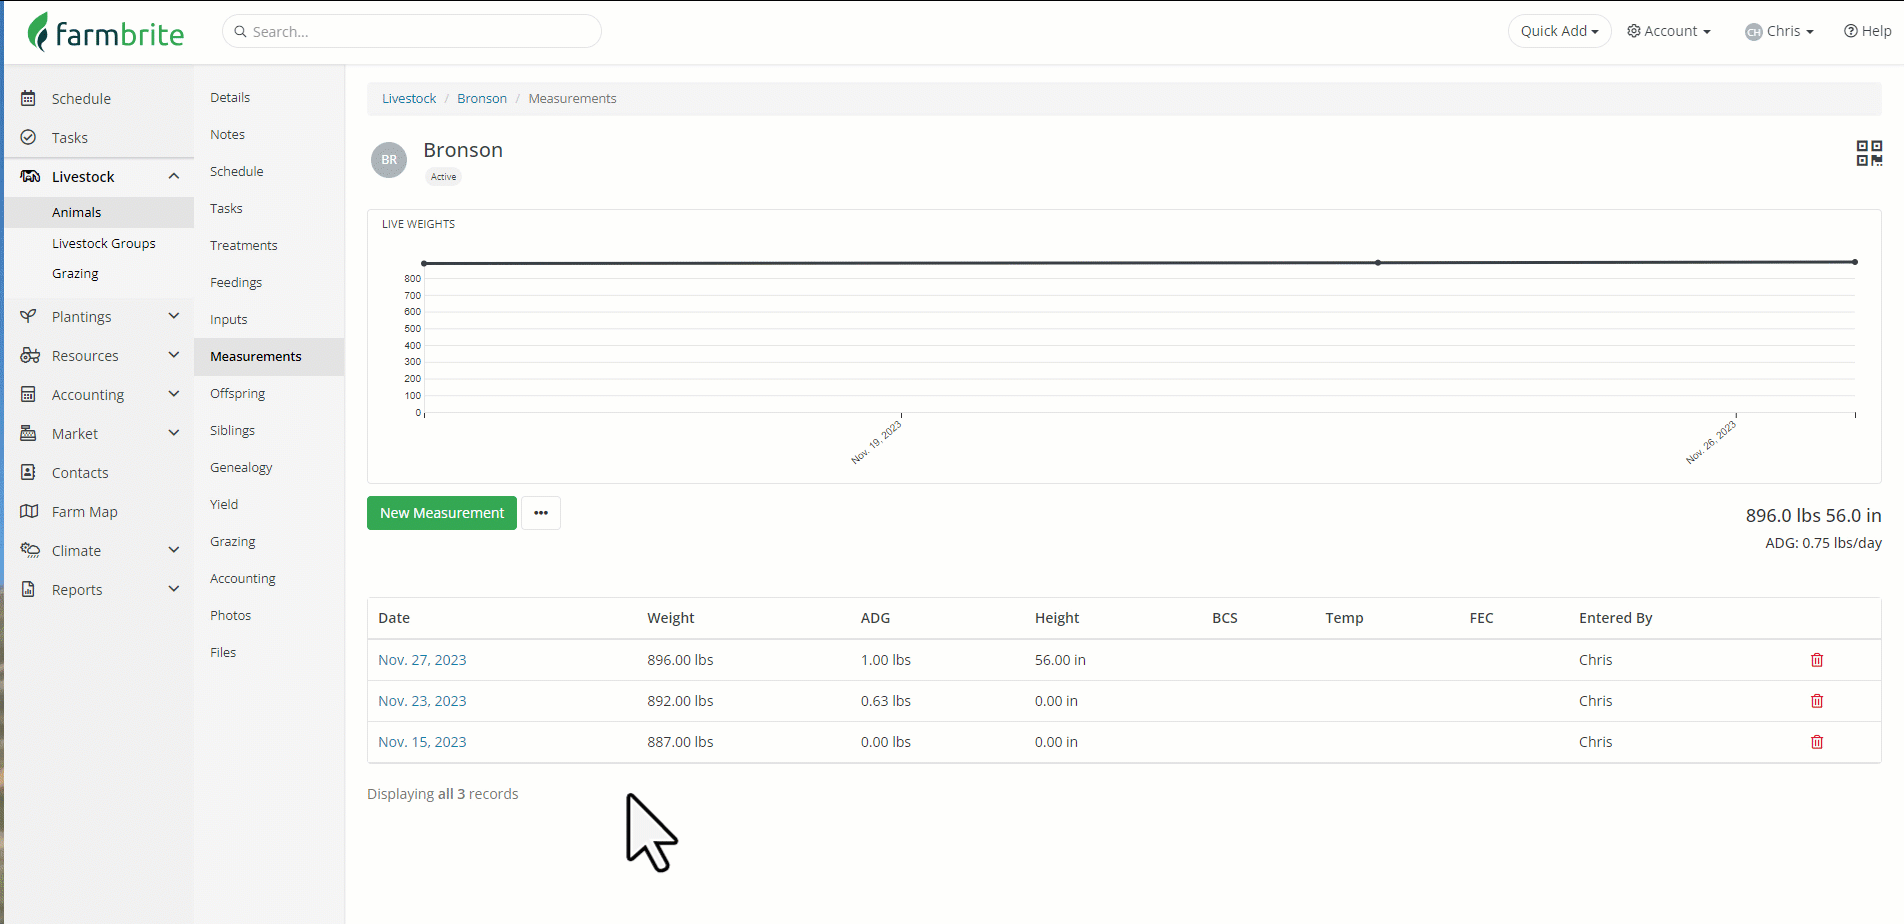
In the example above, you'll see a treatment recorded for a broccoli planting. The custom fields are shown when we add the treatment. Working with animal treatments would be similar, as are animal yields, measurements, and plant harvests. These types of records are within an animal or plant record, so you will see the data in those sections of the record. You can always open the record after it was saved to see the data for the custom field.
Higher level custom fields for Livestock, Crops, and Equipment will be shown on the record itself, like the taxable value field on the tractor or the temperment on the bull shown below.
Reporting on Custom Fields
Besides viewing the custom field data on an individual record, you can also add it to custom reports. This helps you see the custom field data for multiple records at once. Check out this article for a full walkthrough on creating custom reports, but the overall concept is that you'll build a customized report for just the records and data points you'd like to see.
Navigate to Reports on the left and choose Custom Reports. From there, you can create a new one. In the example below we have created a Livestock based report that includes our Expected Butcher Date and Temperament custom fields.
There are also many places where you can export records into a spreadsheet, and the custom fields will be included there as well. Below, we are exporting our measurements for a bull and see the custom field we've created to score their quality included in the export.
Disabling Custom Fields
If you find you no longer need a field you created, you have two options:
- Disable the custom field. It will no longer be shown on records nor reports. However, the data will be retained and you can always reenable the field if you need to access it. This could be useful if you need to archive data that is no longer relevant to your day to day operations but you want retained for future reference.
- Delete the custom field. It will no longer show on records or reports, but the data will not be retained. You might use this to delete no longer relevant fields that are not required for future reference.
Editing Custom Fields
If you don't want to disable or delete a field and just need to make some changes, you can edit a custom field after you have created it. This is done under the same Account>Custom Fields menu. Be careful with this though! You could absolutely make small changes like updating the name, or adding additional options to a multi-select checkbox or dropdown menu. However, we discourage you from changing the field type or the type of field used as data may be lost. You could imagine how trying to turn a dropdown menu from a plant harvest to a paragraph box on a piece of equipment could present issues, and we think it would be better to delete or disable your existing field if you need to make large changes like that.
You are now more familiar with using custom fields and can start creating them. Let us know if you have any questions as you get started!